Sunday, 24 November 2013

Lavinia Stamps. Fairies on Fabric.

Hi Blogstitching friends, just finished the next stage in making the waistcoat.

I have added stitch detail to the printed fabric. I am using this stitch detail to attach the printed fabric to the calico.
This is completed on both front sections and at the back.

 
The next part requires the attachment of the wadding to give the quilted effect.
 
I prefer to do this in the traditional way by tacking the fabrics together, vertically and horizontally.
I realise that this process takes time but I feel that it is necessary to ensure a good finish as quilting on the sewing machine can distort the fabric.
 
 
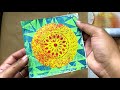
It is particularly noticeable on the photograph how well the prints take on the fabric, the colours are really good.
Hope you will visit Lavinia Stamps and have a look at the range of downloads available.
 
The next stage is to quilt the plain section of the waistcoat.
As the calico is a natural colour, I used a similar coloured thread rather than white.
With this type of design I felt it was more appropriate to have a gentle curve to the machining rather than straight lines which would have been more traditional.
 
 
This was the effect I ended up with on the front.
I also added some additional stitching to the patterned fabric using straight stitching on the leaves.
 
 
So far so good.
The waistcoat is now ready for construction.
 Back soon with the next stage.
 
Crafty Hugs,
Angela x


Saturday, 23 November 2013

Lavinia Stamps Downloadable Designs. Fairies on Fabric.

Hi  Blogbuddies, I'm going back to my roots for this one.
I am making some samples for Tracey at Lavinia Stamps using some of her new downloads.
If you haven't already seen these, click on the link above which will take you directly to them.
Tracey also sells the printable media you need for this technique.
If there is enough interest I will post the complete set of instructions for some of the products I am making.
Hope you will leave a comment if you are interested.

For my first sample I decided to make a waistcoat.
I used the Inkjet Printing Cotton and the Autumn Hues download.
I then cut the printed design in half.

 
After cutting out the waistcoat pattern I attached the printed fabric to the two sides of the waistcoat using bonderweb to stick it down though it could easily be tacked down instead.

 
At this stage the waistcoat is ready for the stitch detail to be carried out.
I am using a very simple manual sewing machine deliberately so that anyone who has a machine that is capable of straight stitch and
zig-zag could easily make something similar.
 
I hope you will leave a comment if you are interested in seeing the stages in the making of this product.
 
Back soon.
Crafty hugs,
Angela x


Friday, 22 November 2013

The Adventures of BP Mini Me.

Hi Mini friends back on my feet again lol!.

 
The dog was very sorry, he's really quite friendly and helped me back on my feet, well, wheels actually.
He's gone very quiet and I have decided it's better to
'let sleeping dogs lie' at least for the time being.
I may have to give him some training sessions.
I'm sure that with training the dog can be a robot's best friend.
 
Have a nice day,
back soon,
BP Mini Me x

Wednesday, 20 November 2013

The adventures of BP Mini Me.

Hi  Mini friends, BP here and I have been walkabout again.
Thought it would be safe today as they are out shopping.
Got a bit of a surprise as the robot dog came to life, his eyes just lit up lol!
He made me jump, I can tell you!!!


As if that wasn't enough he started to move and knocked me clean over!!!
Look at me!!!
 
 
Silly dog, I'm all over the place lol!
 
I am so sorry, I am Teksta the robot dog, I have been switched off for so long that I got a bit excited but don't worry I will have you back on your feet in no time at all.
 
Let's hope so, it's a bit uncomfortable down here.
I will be back when I manage to get up again!
See you soon,
BP Mini Me  and Teksta x


Monday, 18 November 2013

Masterboard Monday Card Ideas.

Hi Blogsters, love making Christmas cards but when you need so many it's necessary to make some quick ones especially if like me you are always on the last leg getting them done.
So for the last couple of days I have been working on some quick cards using my latest Masterboard.
Hope you like them.

I used some of the left-over black card which had been embossed with white powder.
The baubles were embossed with black on white and then coloured with mica paints.
The tag is by Tim Holtz.
Christmas stamps by Jo Firth-Young, Ali-Craft have several different sets of these stamps.

 
Thought a tall card might be nice.
 
 
Back soon with more ideas.
 
Angela x


Sunday, 17 November 2013

Birthday Card Ideas.

Hi Mini Me here, just having a quick look at what she's been up to.
These are rather nice, but not enough cogs and grunge for my liking. Quick! better hide she's coming!

 
Hi Blogsters, I'm sure someone's been here while I was busy lol!
Oh well !
 
Birthday cards needed this week for two special friends but they are not into Steampunk so something pretty needed.
 

Same stamps, different colour schemes.
The stamps are by Heartfeltcreations and the dies by the same company for Spellbinders.
The flowers were stamped and embossed before being cut and then layered and attached to the topper with brads.
The main part of the card was made with a template from House of Zandra.


Love these flowers so here is a close-up.


Hope you like them as much as I do.
Back soon,
Angela x


Blogs I follow

01 09 10