Wednesday, 7 February 2018

WOYWW 453 - What's On Your Workdesk Wednesday.

Welcome to all my new followers, hope you enjoy the journey.

Hi Workdesk friends. 
Here we are for another Wednesday at the Workdesk. 
I am here again to show you:

"What's on my Workdesk this Wednesday".

If you don't know what this is all about then please visit the
 
Stamping Ground, our host Julia will explain.


So here is my desk for today!
I'm working with some left over Masterboards again!

 
But just had to show you how it looked the other day.
Now what do you suppose was in this big envelope!
If you look carefully on the desk there may be a clue.

 
Yes it's new Distress Oxides!
Can't wait to start playing with these.
 
 
I also bought some new brush Pens. These should have been £24.99 at Smiths but they had them at half price so couldn't resist them and I might say they are very juicy.


 My little address book and a stencil, this is not new by the way!

 
A  die which was free with a magazine, a stencil which I've had for ages but not got round to using and some left over stamped flowers.


So that's me done for today.

 Thanks for stopping by and hope you will pop over and join in the visits around the other desks.

 I'm off now to see what everyone else is up to.
Have a great woyww 
and 
happy crafting,

Angela x

Monday, 5 February 2018

Masterboard Monday.

Welcome to all my new followers, hope you enjoy the journey.

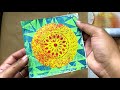
I am here today to show you a card made with this Masterboard:
I found this amongst last year's collection and it had got put on one side and stayed unused so decided it was time to put it to good use so here goes.

  • Kim Dellow stencils, apply Gel through the stencil and allow it to dry which gives great texture and resists the inks which were added next.
  • Add the colour using Distress Oxides with a blending tool and wipe over the gel detail to remove the ink.
  • Stamp the text and rub with a dry cloth to remove the ink from the flowers which gives the effect of the text appearing to be behind the detail.
 
Now this may take a while to make but once you have it you can scan and copy it if you like which will give you more to work with. A laser printer is best for this and you can then alter the colours too with an art program if you wish but well I have just cut up the original as I like the texture too.
How ever you choose you can make cards very quickly and you don't need a lot of extra detail with something as lovely as this. You have great detail while still having a nice flat card to go in the envelope.
So here's what I've created with the first section.
 
And here is the finished card.
 
Mounted in sections with craft card blank, lilac and white layers cut with Sue Wilson dies and a square of the Masterboard on top.
Before attaching the Masterboard section I tied it with a Lilac cord and then added some Tim Holtz butterfly dies and Sizzix sentiment die.
The butterflies were completed with matching Stickles glitter glue.
 
I also used some of the matching stamps to decorate the inside of the card and added a stamped sentiment.


Hope you like the finished card. Still loads of the Masterboard left so you can be sure there will be more cards to follow.
 
 I would love to hear your comments about this project.
 
Many thanks for stopping by and happy creative week,
 
Angela x
 
I would like to enter this card in the following challenges:
Country View Challenges-Feb 2018-Anything But Cute.
Fashionable Stamping challenges#131- Anything goes.
International Art and Soul CH#26-Texture
 

Friday, 2 February 2018

Friday Fun Day with Smiles.

Welcome to all my new followers, hope you enjoy the journey.
Angela here again to show you what I've been up to this week.

Sorry to be a bit boring but you will have to put up with a few more of my holiday pics. Lol!

I arrived home to these little beauties.
They always go mad like this when we're away.
These are Dendrobium and truly beautiful.


More gorgeous food from the hols.
 
For those of you who aren't steak lovers you wont see any today but a nice fish dish.

 
French toast, lovely with a little ice cream too.

 
Smoked Salmon and Scallops, Yummy!

 
Chocolate brownie and Ice cream with a massive blob of cream on top!

 
I'm sure this must be low in calories Lol!
 
 
Ski instructors coming down to meet a group of Dentists who were having a conference week in the hotel.
Their skis had disappeared due to the depth of soft snow.


It's not easy taking the photographs as everywhere is so white as you can see here and the sun was hiding too.


 Chainage area.
Not something we are used to in the UK.
I of course took these photographs from inside the car Lol!


 Pleased we don't have many of these either!


 Onward.


 We don't however drive all the way home but go by plane from Grenoble to Leeds Bradford.
 
 
 Pick up the car and we're off again.
But so as not to bore you... here we are nearly home.

 
My dear friend gave me these before we left the hotel.
They are enough to make anyone smile!


 As well as the Orchids we have these little beauties in the garden too which must mean spring is on it's way.


I might be a bit late getting round today as I'm off visiting a friend this morning but will see you all later xxx
 
So that's all for now.
Have a great weekend everyone and
 thanks for stopping by.
 
 If you would like some more smiles you just need to pop over to see what our other friends have been doing this week at Annie's for
"This Week's Smiles" and you can also share your  smiles too.

Angela x

Wednesday, 31 January 2018

WOYWW 452 - What's On Your Workdesk Wednesday.

Welcome to all my new followers, hope you enjoy the journey.

Hi Workdesk friends. 
Here we are for another Wednesday at the Workdesk. 
I am here again to show you:

"What's on my Workdesk this Wednesday".

If you don't know what this is all about then please visit the
 
Stamping Ground, our host Julia will explain.


So here is my desk for today!


Nothing much different this week other than I am going through some left-over background papers which you can see on the desk, waiting for me to decide what to do with them.
I need a project for Monday's post so need to get my finger out and make something!

However as promised last week I have opened the parcels that came while we were away.
There were some brilliant January sales bargains so of course you can't miss these Lol!
 
These are from The Craft Barn.

 
Craft World and That's Crafty.


Country View Crafts.

 
  I'm thinking of turning the bunny into a Prim.
Bet I know someone who will love this die.
 
 
Lots of nice stuff there just got to get on and use them.
 
If you want to see something actually made! you might look at the post below this one.

So that's me done for today.

 Thanks for stopping by and hope you will pop over and join in the visits around the other desks.

 I'm off now to see what everyone else is up to.
Have a great woyww 
and 
happy crafting,

Angela x

Monday, 29 January 2018

Crafty Cardmakers Challenge 'Get Inky and Messy'

Welcome to all my new followers, hope you enjoy the journey.

Hi! back again to tell you that it's time for another challenge over
at Crafty Cardmakers.

Chanya is hosting today and our challenge is 'Get Inky and Messy'  .


As usual you can enter anything you fancy, it doesn't have to just be cards, as long as it meets the challenge.

 Hope you will join in.
And here is my project for the challenge:


I started with a sheet of mixed media paper.
 
 
Distress Oxide inks, just rub these straight onto the paper.

 
Spray lightly with water and allow it to drip down so that it blends.
If you don't want the blended effect but want to keep the colours clean then apply one ink at a time, spray, drip and dry each one before adding the next.

 
I used the following piece to dry the inks and as you can see you are left with another interesting piece which can be used for another project.


Next I used these dies to cut the coloured paper.

 
To complete the card I began by stamping on the card blank with a text stamp and then started to add the die cut pieces.
Some of the pieces on the card are those left-over sections after cutting the main pieces. I'm sure you will see that these shapes may be waste but they fit really well with the actual die cuts.

 
A little more stamping.
I especially like the faux stitching.
 
 
I took the main die cut piece and using a blending tool covered the edge with black ink. This technique will give more depth to the main image as it produces a shadow around the edge then stamped on the sentiment.

 
Then attached it to the card with 3D foam stickers after adding some coloured yarn for extra texture, and interest.

 
I finished this off with coloured sequins.


 I hope you will pop over to see what the rest of the DT have been up to and maybe join in the challenge.
I look forward to seeing what you come up with too.
 Happy crafty card making.
Angela x 

I would like to enter this card in the following challenges:
The Artistic Stamper - Creative Challenge#1 2018-Anything Goes.
Country View Challenges: January 2018 - Anything Goes.
Happy Little Stampers: January Anything Goes with Dies.

Fashionable Stamping Challenges - Challenge #131-Anything Goes

Friday, 26 January 2018

Back to the Craft Barn with Texture Embossing Folders.

Welcome to all my new followers, hope you enjoy the journey.
Hi everyone just here to let you know this is another project for the Craft Barn and it's live now.


I've been working with Texture Embossing Folders, Starlight paints and Kim Dellow stamps and here is a peek of how I used them. If you would like to see how I made this card then pop over to The Craft Barn for full details.


Tutorial for making this project is available now at The Craft Barn.

I would love to hear what you think about my project and any comments will be gratefully received.
 
Look forward to seeing you at The Craft Barn.
 
Happy creating,
 
Angela xXx

Blogs I follow

01 09 10