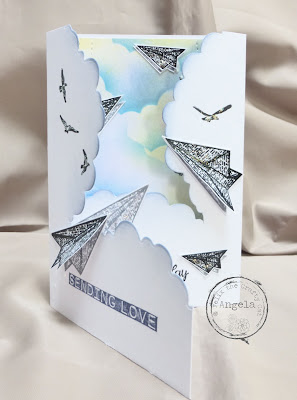
Like many people there are times my Mojo just leaves home.
I hope this page of techniques will help when this happens and if it helps other too....well that's even better.
Happy crafting, Angela x
Techniques as follows:
2025
Stencils and Masks
Embossing folders
2024
Alcohol Inks
More ideas here and here:
Collage
Collage Grids.
2023
2022
I have used this before which you may remember.
Wax resist.
I used wax paper for this but you could use the wax wrappers from Cereal boxes too.
2021
Retiform (details)
The term Retiform refers to anything net like, an example would be the the connective tissue cells of the framework of the Lymphatic glands but enough of that so let's get on with the fun bit Lol!
The process is simple but maybe a little time consuming to make a Masterboard with this technique.
You need a few stamps and a set that work together is a good idea they could even be based on a theme, Christmas, seaside, gardens, it's endless.
And this is what I made.
2020
2019
Heat embossing.
Distressing Paper.
Details here.


If you'd like to see what happened with this you can find it here.

Lots of interesting patterns can be made.
A card made using the Bubble paper and Aall and Create stamps.
Bleeding Art Tissue.
This card can be found here with details.

And this card can be found here.
Stamping on UTEE
explained here
1. Mono Prints.
2. Melt Pot.
3. Stamping into UTEE.
For this I have placed the Ultra Thick Embossing powder onto the heat resistant mat and melted it with a heat gun before stamping onto it but it could be done by pouring UTEE from the melt pot onto the mat and then stamping into it.
With this technique I have coloured the stampbord with ink using cut and dry, allow this to dry and then rub embossing ink onto the stampbord.
Next I added embossing powder building up the thickness and then stamping into the final layer.
You can stamp into this while it is warm to create texture or wait for it to cool and then stamp.
I used a larger stampbord for the cover pages stamped the clock images and then the embossing powder adding glitter during the heating process.
The embellishments on the ribbon are shrink plastic.
3. Die Cutting.
4. Stencil and Masks.
- Sponging through.
- Embossing.
- Spraying.
- Stamping.
- Masking.
5. Gilding.
Gilding Flakes.
Gilding Wax.
6. Heat Embossing.
8. Embossing Folders.
9. Shadow Stamping.
10. Colour Dragging.
(This has many names e.g. smooshing, colour pulling, swiping.)
11. Glassine Texture.
12. Stamping on Acetate.
Ensure the acetate is clean, rub over with a non static bag and stamp with Stazon or heat emboss other inks, in which case you must ensure you are using a heat resistant acetate.
13. Stamping on Shrink Plastic.
This is a great idea for making your own embellishments.
This one was made with the same teddy stamp, cut out and heated.
The butterfly earrings and pendant were made using the same technique.
14. Fusible Fibres.
The wings on the Art Doll above were made using Fusible fibres.
This is best done with a rubber stamp though Clarity stamps will also stand up to the heat required to do this technique.
Apply ink to the stamp.
Layer the fibres over the stamp, enough to cover it but not too thickly.
Cover this with greaseproof paper to protect the iron.
Put the iron on a fairly hot temperature and press gently onto the paper.
When you start to see the image under the paper it is ready and you can remove the paper to reveal the stamped image.
Trim the fabric as required.
15. Digital Downloads.
These are projects made using the Lavinia Stamps, Fairies on Fabric Downloads.
Instructions for making these projects are available on this blog and can also be found on the Lavinia Stamps Web site.
Autumn Huges
Zen Fabric 1
Fairy hearts
The downloads can also be used with shrink plastic, this one is available at
The Stamp Man and I used it to create the smaller hearts seen above.
Zen Houses
I know this page will develop further in the future so things may have changed if you visit again.
You are welcome to call back if like me, you need a little inspiration now and then.
If you need any help just leave me a comment and I will get back to you.
Happy Crafting,
Angela x


.jpg)


.JPG)


.jpg)


No comments:
Post a Comment