Welcome to all my new followers, hope you enjoy the journey.
I am here today to show you a card made with this Masterboard:
If you think this is not finished you'd be right.
I'm writing this post for all those lovely people who've told me that they are not familiar with the Retifom technique.
The term Retiform refers to anything net like, an example would be the the connective tissue cells of the framework of the Lymphatic glands but enough of that so let's get on with the fun bit Lol! So the process is simple but maybe a little time consuming to make a Masterboard with this technique.
You sure will have fun with the finished project.
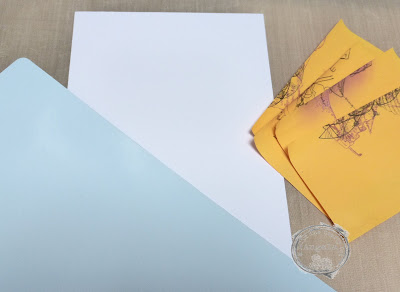
You are going to need some Sticky Post it Notes, stamping card (this sample piece is A5: 148cm x 210cm) and a piece of stiff card for the blending process.

I've used three colours of Oxide ink but you can use just one or more if you wish. You know what...it's up to you!

With the first section you may wish to leave a blank area to add a sentiment later.

If you find the card moves you can use the sticky notes here too but I find it quicker this way especially when working on a Masterboard.
Hold the card firmly and then blend the ink upwards towards the white card.
Tip: don't add too much ink to the blending tool.

This is the type of finish you are aiming for.

And now it's time to start the stamping.
Use the Sticky Postage Notes to outline the area where you are going to stamp. I'm using a variety of AALL and Create stamps for this project.

Stamp your chosen image and then remove the sticky paper and move to the next space.

Continue with this until you've filled all the sections.


I trimmed the card down, added a sentiment and edged it with a matching ink.
Next I layered it with two colours of plain card finishing it with some Stickles Glitter Glue.

I'm back to the A3 Masterboard and I'll show you next week how I finished it.
Hope you enjoyed watching me make this.
I would love to hear your comments.
Many thanks for stopping by and happy crafting,
Angela x


.JPG)


.jpeg)

.jpg)


6 comments:
Wonderful and intricate masterboard, Angela, have a great week, hugs, Valerie
Now this is a blast from the past... I remember doing a Retiform for the Craft Barn!
It is time consuming but different and I haven't done one since...
Have a great week and a Happy Christmas too in case I can't get around to come back here before! x
Love your finished A5 card, this method looks a bit painstaking and doing an A3 piece very time consuming. I have seen cards where there is no visible line done in what maybhave been a similar way. Thank you for showing us this method. M look forward to seeing the finished A3 piece. x
Thank you so much for finding the time to explain this Angela and what a creative and effective technique it is. It's now on my to do list, thank you for the inspiration x.
This is an excellent tutorial, Ang - I so appreciate the clear, consise directions and photos! Many thanks...
Really clear tutorial on an interesting technique. Versatile as you can use any colours or stamps to suit the occasion. Thank you.
Post a Comment