Showing posts with label distress inks. Show all posts

Monday, 6 October 2025

Make it on Monday.

       Welcome to all my new followers, hope you enjoy the journey.

I am here today to show you a  new Ledger journal page:


I made the background with two stencils, an Altenew for the water, one for the Sea Urchins and two colours of Distress Oxide inks then finished with Stickles Glitter Glue.


 It took me some time to decide what the focal image would be and then remembered some old dies by Tim Holtz.


I must have had these for ages but they work really well with this background. I think these dies are available again now as Thinlits.
I've cut the Urchins with Kraft card and then added Distress inks by smooshing and splatters then darkening the edges with a blending brush. 
The Seahorse was white card and colours of distress inks, crackle graze and Stickles Glitter Glue.
Finished with a sentiment.

I'm pleased that's finished as I have other things to come soon.

I would love to hear your comments.

Many thanks for stopping by and happy crafting,

Angela x

Monday, 31 July 2023

Masterboard Monday.

 Welcome to all my new followers, hope you enjoy the journey.

I am here today to show you another new Masterboard:


All finished and ready to go.


Instructions for making as follows:
Start here:


And you're ready to start.
You could put tape round the outside edge too though I haven't tried that yet.


I scribbled on some pencil lines and then added colour both Tim Holtz Distress Ink and Oxides with a blending tool.


Spray it with some drops of water and dab it with some spare card.


Which will give you this lovely patterned card and some washed out spots.
I'm sure we'll find a use for the mop up card.


Next some detail with a stencil and white ink to tone it down.


Perfect or what?
Well I like it Hee! Hee!


A close up also shows the black splashes added and the scribbled lines were used as a guide to adding white free hand details.


And we're back to the finished Masterboard.
You need to remove the Washi tape gently. Pull it towards you keeping it flat with itself do not try to remove it by pulling upwards. This will more or less prevent it pulling any of the surface off the card.....more or less that is!

Cards to follow next week.

I would love to hear your comments.

Many thanks for stopping by and happy crafting,

Angela x

Monday, 10 July 2017

Masterboard Monday.

 Welcome to all my new followers, hope you enjoy the journey.
 
If you visited me last Wednesday you will remember that I had a parcel, new Oxides! Set 2. and I am here today to show you some samples made with these.

 
So I had a play with them.

And these are samples but I haven't used all the colours so more samples will follow soon..
 

This set seems brighter than the first set and I love them.
 
So far I have used about half of the new colours together. I hope to find time soon to complete the tests with the new set and also combine some of the colours from set 1.
 
 However this is Masterboard Monday so here is a card I've made with one of the new samples.
I cut the sample to the required size and then stamped on it with a text stamp and a Butterfly stencil by Memory Box (Flutter).
I've not used Tim's birds for a while but I think he works quite well on this card but what do you think?
 
 
I combined the finished Masterboard with stamps and dies by Tim Holtz and added some Craftwork Cards Candi embellishments.
Oh and I put a small blob of Glossy Accents on the eyes too.
 
 
The Masterboards may take a while to complete but once you have them you can make cards fairly quickly and that's what I am off to do right now!

 I would love to hear your comments.
 Many thanks for stopping by and happy crafting,
 
Angela x

Wednesday, 1 March 2017

WOYWW 404 # What's On Your Workdesk Wednesday.

Welcome to all my new followers, hope you enjoy the journey.

Hi Workdesk friends. 
Here we are for another Wednesday at the Workdesk. 
I am here again to show you:

"What's on my Workdesk this Wednesday".

If you don't know what this is all about then please visit the
 
Stamping Ground, our host Julia will explain.


So here is my desk for today!

 
I don't seem to have got very far with this Masterboard so I apologise, I have had other things on which you can see if you click here and some other stuff which is " For My Eyes Only" at the moment but you will get to see them, so I have to be excused.
I think this might be something I just keep coming back to until it's finished.
 
I've been colouring it with distress inks by rubbing them on my craft mat and applying them with a brush.

 
Quite fancy adding some Distress Oxides which might be fun! We shall see! Cos yes! I have them and I'm having fun trying them out, samples will follow soon.


So that's me done for today.

 Thanks for stopping by and hope you will pop over and join in the visits around the other desks.

 I'm off now to see what everyone else is up to.
Have a great woyww 
and 
happy crafting,

Angela x

Monday, 11 July 2016

Crafty Cardmakers #168 Bling it Up.

Welcome to all my new followers, hope you enjoy the journey.

Another Monday and another Masterboard project!!!!

But I am also back to tell you that it's time for another challenge over
at Crafty Cardmakers.

Mary is hosting our Bling It Up challenge, so let's see lots of gems, sparkle, glitter, anything that adds a bling quality to your creations.
As usual You can enter anything you fancy, it doesn't have to just be cards, as long as it meets the challenge, and doesn't exceed the 15 total challenges entered rule!

For my project I've been making a scrap book/journal for a friend, it's a gift for her daughter's birthday.
I  was told she liked greys but some colours too, possibly pink or green so there we go. It will have greeting cards mounted inside it so needed something with good pages weight so I used a Pink Pig watercolour sketch book.

I had thought about decorating the actual cover but wanted to keep the finish neat so I decided to make the design on card and attach it to the front cover on completion. So here goes.

Made the Masterboard first as you can see here.

 
I normally work with A3 paper and card as it gives you more to work with when complete but as this was A4 I made two similar Masterboards using Tim Holtz stencils, Distress Inks and Seth Apter stamps.
Finished, they looked like this.


The Process for completing the design:
I used a Tim Holtz die to cut away part of the Masterboard and some Seth Apter circle dies to add to the stamped images. This was mounted onto a sheet of black textured card.


More stamping:
Kaisercraft sentiment stamp and the butterfly is Tim Holtz.
 
 
The sentiment here was Paper Artsy.

 
And some gilding to make things pop a little.
Nothing like a bit of shiny stuff to add Bling!
I so love this Mixton Relief by Pebeo.
 

You can make tiny dots with it too.

 
Next attached the design to the cover layering it with more card. I still felt it was missing something.

 
A Bow!
Nothing like it to finish stuff off Lol!
 
 
So here is the finished journal cover.

 
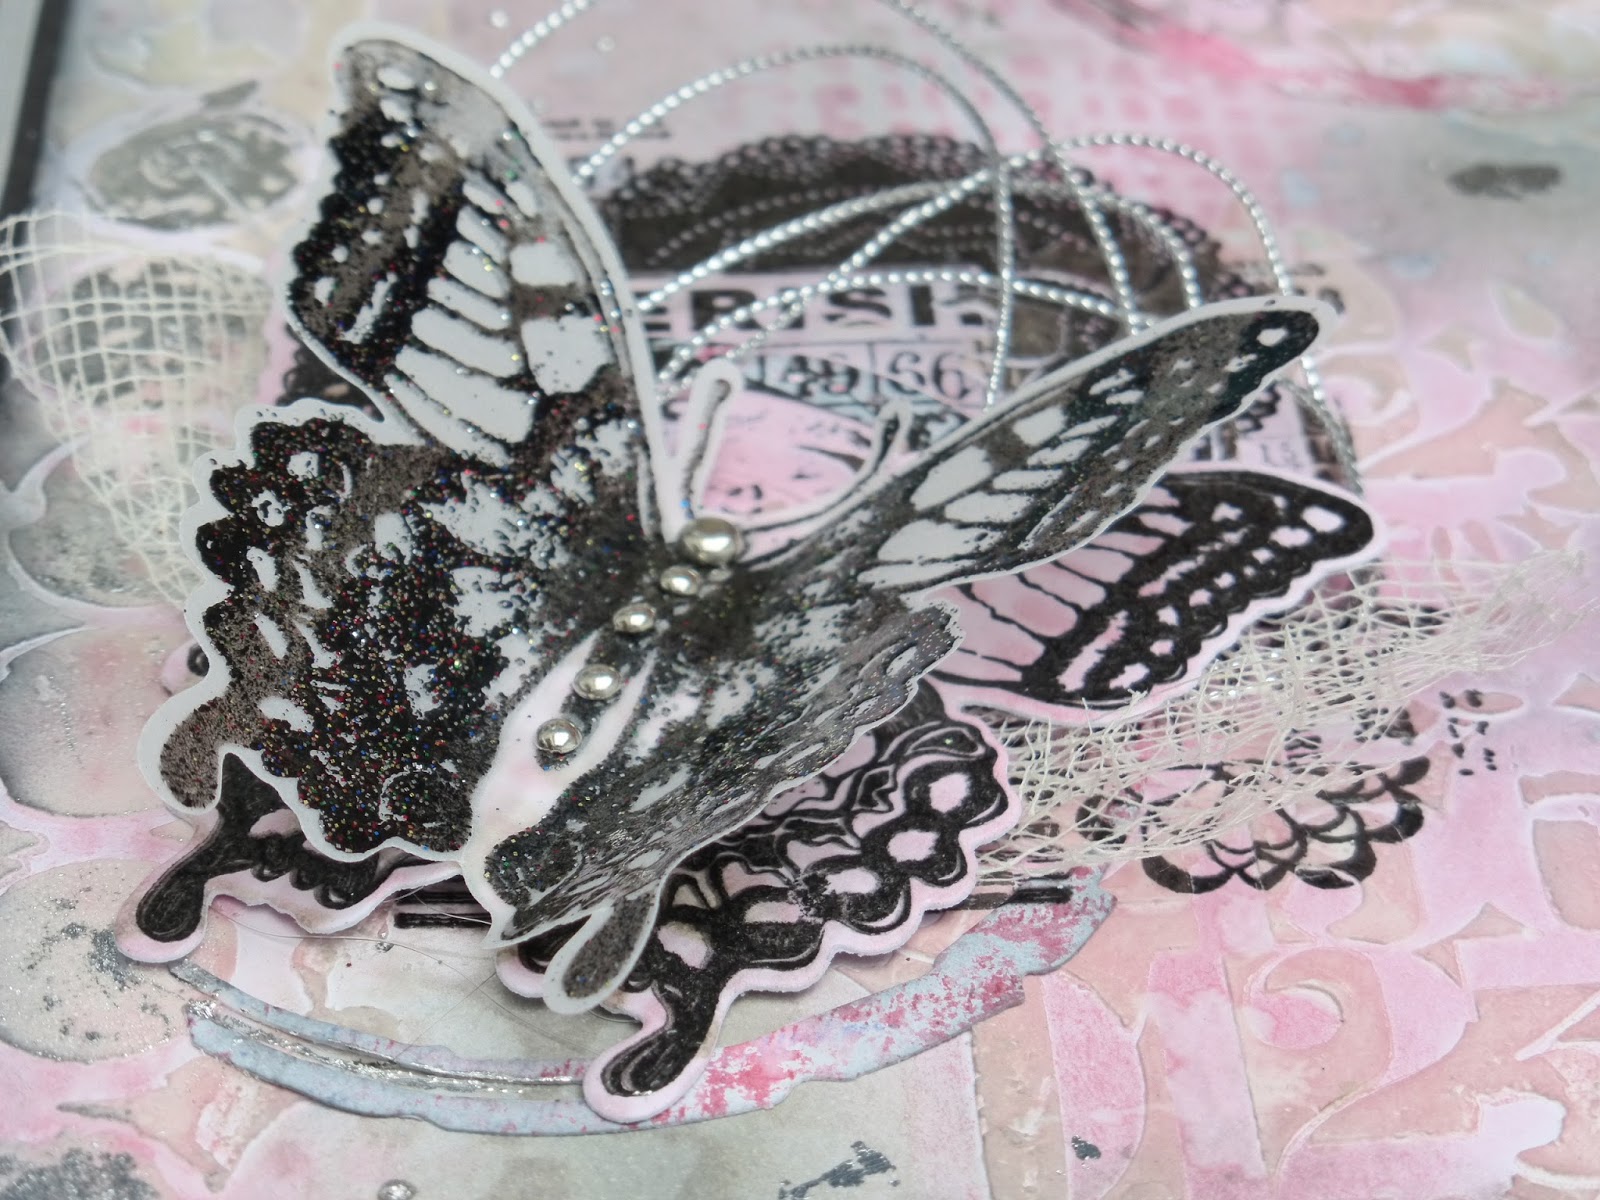
Few close-ups of the butterfly mounted onto silver cord and net, finished with silver brads.


I have decorated the inner pages too very lightly so as not to detract from the cards that will be mounted inside. Just couldn't leave them blank.
 
Some of the stamps used on the pages:
 
Inkylicious Moments, Seth Apter circles and IndigoBlu swirl.

 
Visible Image sentiment.
 
 
Inkylicious sentiment stamp.


So that's your lot really and if there is anything you want to know just ask.
 
I hope you will pop over to see what the rest of the DT have been up to and maybe join in the challenge.
I look forward to seeing what you come up with.
 Happy crafty card making.
Angela x

 
 I would like to enter this project in the following challenges:
Country View Challenges: July: Have Fun with Circles.
Altered Eclectics: July Challenge Anything Goes.
City Crafters Challenge blog: week 319 - the Book of Love.
Stamping Sensations: July-Anything goes with a stamp and ribbons.
Love to Create challenge 14: Anything Creative / Mixed Media goes.


Wednesday, 9 October 2013

Journal Away Wednesday.

Hi Blogbuddies  has anyone seen a little robot wandering around? He seems to have gone missing lol! again!

Anyway, I just wanted to show you something I have been working on in my journal, it is the start of what will be a more detailed page.

 
I really like these light bulbs, the smaller ones were by Creative Expressions and the larger ones by The Artistic Stamper.
I am not sure yet how I will finish this and I may copy it and use the print for something else, so it may end up being used as a Masterboard! we will see how it goes.
Thanks to the clever person who invented the scanner, lol!
  • The yellow background was Mica sprays and distress ink, rubbed onto a craft mat and then swiped onto the pages.
  • When this was dry I stamped the light bulbs around the page and stamped the large bulbs more centrally.
  • The pattern on the large lightbulbs is actually on one of the stamps.
  • In some cases I masked the bulbs before stamping the others to give depth to the design.
  • The darker colour was added as a wash with a watercolour pencil and some of it was removed by blotting.
  • I have also added some highlights to the pattern on the large lightbulbs and parts of the smaller bulbs using a white pen.
The mica has actually made the page quite shiny, though it is difficult to see here.
 
More to come later.
Angela x


Sunday, 4 August 2013

Prima Doll Tag

Hi Blogsters,  if you have come from the Ali-Craft blog you will have already seen this as it is the sample I made for the new blog challenge if not, hope you will pop over and join in.
You will need one of the Prima Doll stamps, there are plenty to choose from and you can get them here. The prize is a £15 voucher to spend on the website.


  • First I embossed the tag with the Wonky Street Mask from Ali-Craft, then applied distress ink onto the craft mat and swiped the tag over it.
  • The border around the edge is the girls skirt, stamped several times and cut out and finished with Stickles Glue.


  •  The cat and the bats are a Tim Holtz Movers and Shapers die.
  • I made her underskirt and bow by stamping several times onto card which I had sprayed earlier with Cosmic Shimmer sprays and then cut and layered the sections.
  • The flowers were cut from the same paper using a Tim Holtz Tattered Florals die.

I finished this off with ribbon, more stickles glue, various
shading and Gelly Roll pens to colour her stockings.
I hope this will give you some inspiration for the challenge
and can't wait to see what you come up with.
Hugs Angela x
P.S. see you tomorrow for Masterboard Monday lol!

Monday, 15 July 2013

Masterboard Monday

Hi Blogmates I have decided that Mondays are going to be Masterboard Day.
I promise to show you some of the things I have made using the Masterboards but they may follow later depending on time.
It always seems a shame that we make these Masterboards and then have to cut them up to use them which means the original work is lost.
Although they are not quite the same when copied, I have started scanning them into my computer and printing them off for further use.
I make my Masterboards on A3 paper and though I do not have an A3 printer, I still find the designs useful as A4.

So here is the first of many.

 I made these Masterboards for a project using Stampotique stamps.
 The papers were made with sprays, stencils, stamps, masks, sequin waste, crackle paint and tissue paper.
 I used a variety of inks but mostly Tim Holtz Distress Inks and Ranger Archival.
This was completed in the same way but giving a slighted more muted effect.

Hopefully you will get to see the finished product tomorrow.
Bye for now.
Angela x

Blogs I follow

01 09 10