Showing posts with label pop-up box card instructions. Show all posts

Monday, 6 April 2020

Crafty Cardmakers Challenge - 254 Easter.

Welcome to all my new followers, hope you enjoy the journey.
Hi! back again to tell you that it's time for another challenge over
at Crafty Cardmakers.

 Marlene is hosting today and our challenge is Easter.


As usual you can enter anything you fancy, it doesn't have to be cards, as long as it meets the challenge. 

Hope you will join in.
And here is my project for the challenge:


This is a Tuxedo Box card, something I've been wanting to have a go at making.


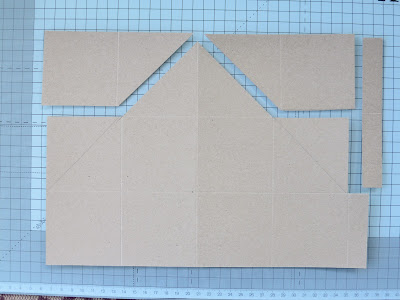
The scoring is done first at 2 3/4", 5 1/2", 8 1/4" and 11" which will leave you with a small strip at the end.

Turn the card once clockwise and score again at 2 3/4" and 5 1/2".


I marked this with a pencil those parts that need to be removed and scored.


This probably makes it easier to see the stage.


 Reinforce the score lines and it should look like this.
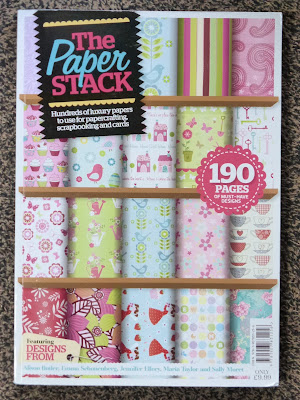

It's not often I do this but I have had this book for ages so decided it was time to use some of the papers.


Cut out the shapes slightly smaller than the card blank and edge the pieces with a matching colour before attaching them to the background sections.


The flaps are used to hold the embellishments.
Cut these 3/4" wide by 3 3/4" in length and fold 1/2" at each end.
Attach these at the side panel as shown then dab glue onto the two loose ends, gently close the card to position the tabs and attach.


Attach double sided tape to the joining flap and attach it to the other side.


Ensure as you do this that the card will lie flat.


It should now look like this.


At this stage you can add the embellishments.


Which are attached to the inner flaps.

I hope you will pop over to see what the rest of the DT have been up to and maybe join in the challenge.
I look forward to seeing what you come up with too.
 Happy crafty card making.
Angela x 

Monday, 22 July 2019

Wedding card.

 Welcome to all my new followers, hope you enjoy the journey.

I am here today to show you a card I've made using the pop-up box technique:


Started by measuring, scoring and cutting an A4  sheet of Mirri card.

.
As this is only shiny on none side I have added more pieces of the Mirri card to the opposite side at the top. 


Layering next with some nice patterned Mirri card a kind of silver grey.
I've also prepared the inner support strips and lots of die cut hearts plus a large lace heart which will decorate the back.


I applied the larger heart first leaving one side loose so that it will not effect the fold.


Then tucked the loose section towards the back out of the way.


Then attached a smaller embossed heart and turned the box.


By turning the box it helps you to remember which direction these sections need to be decorated.


Once the outer sections are completed the box can be joined at the sides and the support inserts attached ready to add the rest of the heart embellishments.


I've also added some net to the inside and matching gem stones.


The sentiment is a rub on from my stash.
All that's left to do is to fold it flat and place it in the envelop, just hope the happy couple enjoy it.

If you like this card I do have a set of instructions which can be found here though there are lots on the internet too.

Many thanks for stopping by and happy crafting. 
Pleased to hear any thoughts you have about this project.

Angela x

Monday, 5 May 2014

Prima Cartographer Papers, Pop - up Card.

Hi happy Bloggers, here to show you the Pop-Up box card I have made using the Prima Cartographer Papers.


Here is the finished card.


The Pediment at the back was cut out using a Tim Holtz die available at Ali-Craft.
To make this card:
  • First I cut out the basic shape for the box by resizing the 12"x 12" sheet to make it A4.
(If it helps I have an instruction sheet available for this card.
You will need to open it, to see it clearly).
  • Next, I cut out the images that I would use to decorate the box sides and flaps.
  • The balloons where cut out and attached to thin strips of acetate. When they are fixed inside they appear to be floating above the box.
  • I also used several of the sentiment stickers around the box and the flaps.
Outer sections of the card.
Showing it closed and flat.


I hope you found this tutorial useful and go over to have a look at the papers in stock at Ali-Craft.
 
Happy crafting,
Angela x

Thursday, 6 March 2014

Masterboard Card Ideas.

Hi Bloggies here are the instructions for the box card I made.
So many people have asked me about this box and also about Masterboards.
I first read about masterboards in a Stampington magazine (probably the best craft magazines in the world, though that is just my opinion of course lol!).
They are just background papers that you make yourself and can be used for die cutting, matting and layering, punching etc.
It also allows you to make a collection of items, greetings cards, ATC's, wall panels, journal pages, tags, wrapping papers etc. all with similar designs without having to buy costly papers.
I generally make mine A3 but it could be any size.

Anyway, here are the instructions for the box card.
 
I began by making the card blank. 
I have posted this before but for anyone who has missed it this is the pattern that I came up with.
You will need to click on this and open it as it is hand written.
These instructions are for a card which fits a 6" envlope and is made with an A4 piece of card.
The card I made here actually fits a 8" envelope and was made from an A3 piece of card, just adjust the measurements.


 Next, cut out the mats from the masterboard and matching coloured card.
I have cut out some of the leaves which I will use later.


After cutting and creasing the card blank, I started the matting and layering of the box.

 I used ribbon to add interest to the matting.

 
I decided to emboss the flowers once they were die cut, swiped over the embossing with distress ink using a blending tool, added embossing powder and heated this to give the flowers a shine.
I layered the flowers and attached a brad to each one.


Next glue the box together and attach the flowers and leaves.
Take care when doing this to just check that when it is layed flat that the flowers are enclosed within the box or you will be unable to get it into the envelope.
I also stamped out some hearts and butterflies which were attached amongst the flowers and side of the box.


 I added text, including a sentiment at the front and completed it by adding stickles glue.
On this box, I have put the back lid in an upright position but it can also be left down like the others if wished.
 
And here is the finished box.


 Hope you like this card and if there is anything I have not covered sufficiently please leave me a message.
 
 Back soon,
Angela x


Blogs I follow

01 09 10