- 5" x 7" Card Blank if use/needed.
- 4 3/4" x 6 3/4" Base card any colour or White/Black.
- 12" x 12" Decorative double sided card/paper ideally 180 - 200gsm, so not too thick and cut a piece 12" x 6 1/2".
- The inside and outside sentiment Panel can be any plain colour and the size depends on the front panel used but you could have this on the back too if you prefer.
- Choice opf embellishments: flowers, insects, leaves, to fit the design of the paper/card.
- Score the double sided card/paper at 1 1/2" - 4 1/2" - 6" - 7 1/2"
- Attach the 4 1/2" right (widest side) to the base piece and then fold the next piece (3 to 4) towards it and crease well. Fold the next crease, then going V and M until complete.
- I added a plain panel piece to the inside to add a sentiment which is not seen when the card is closed but could be smaller or attached to the back or inside the 5" x 7" if used. The size of this will depend on how you decorate the front as I like the inside panel to be hidden when the card is closed.
- Add your chosen embellishments to complete the card.
2 Sheets
A4 card from which you’ll cut:
Card
Base: 1 piece 5” x 7”
1 piece
5” x 6”
1 piece 5” x 5”
Springs: 4
pieces 1 ½” x 1” (attach between the
card bases)
Centre Springs 2 pieces 2 ¾” x 1” (front and back)
Front
Panel: 1
piece 2 ¾” x 1 ½” (sentiment,
embellishments)
Sentiment
panel: 1
piece 5” x 2 ¾” (for adding a
sentiment to the back)
Patterned
Layers: 2 pieces 4 5/8” x
3 1/8”
2
pieces 4 5/8” x 2 5/8”
2
pieces 4 5/8” x 2 1/8”
These can be
all the same pattern or different.
Embellishments are up to you. The finished card fits in a 5” x 7” envelope.
ooo0ooo
Instructions for construction:
Card Base:
5”
x 7” piece On the Long edge,
score down at 3 3/8” and 3 5/8”
5” x 6” piece On the long edge, score down at 2 7/8” and 3 1/8”
5” x 5” piece Score down at 2 3/8” and 2 5/8”
These score lines form the centre spine so burnish well. On each piece lightly mark both score lines 1” up from the bottom and 1” down from the top to the side of the spine. Cut from outer corners to the mark then straight across the spine which forms the layers of the bow shape.
Patterned Layers:
Remember when cutting one will be on the right and one on the left. On all six pieces the measurement will be 7/8” up from the bottom and down from the top. Cut from outer corner as before.Attach these
layers to the card base then stick the three bases together down the centre
spine with the smallest on top and add embellishments.
Springs: Score the 1 ½ “ piece at ½”, ¾” and 1”. Fold MVM
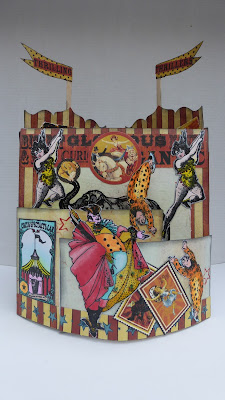
- Triple Point Card or Crossover Point Card.
- Pinwheel Tower card.
- Bendy Cards.
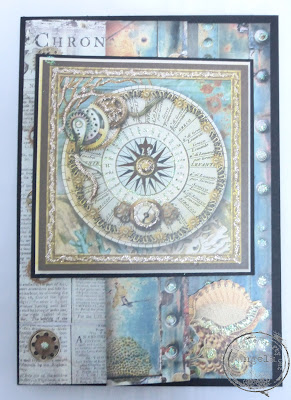
This is the card I made and you can clearly see where it gets it's name Bendy as the front pieces bend as they fit together.
There are a number of ways to achieve this but I feel that the simplest and quickest method is to use a square card, you can do this with any size but I have used 7"x7" for this example.
- Open the card and cut down the centre about half way and then horizontally to remove this top section of card. This piece will be attached to the other side.
- I have cut a curve along mine as I am using a sea theme but when you get used to making these you will see how you can alter this stage to suit what you are making.
- Next fold one side of the piece you have cut away to create the section which will be used to attach it to the main card as shown below.
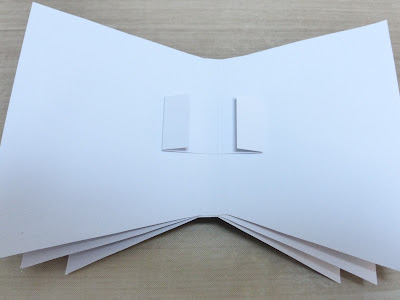
- Both pieces will then need to have a tab made which will be inserted to create the bend as shown below. You don't need to worry too much about the size of this as long as you make sure the slits fit. The one I made is about 1" wide and 1/2" deep.
- Now we need to make the slits - one in the main card and one in the left front piece.
- I did mine at 1" from the fold on the inside and 2" from the fold on the outside flap as shown below.
- At this stage it is time to decorate the card and you will realise as you do this that you need to score the slits again because you will be covering them with any paper you stick on.


.JPG)


.jpg)


No comments:
Post a Comment