Showing posts with label embossing. Show all posts

Monday, 24 April 2023

Monday Fun - Use it or Lose it.

 Welcome to all my new followers, hope you enjoy the journey.

I am here today to show you a new Art journal page:

 
I have had so much fun with this one.

 
I started by embossing with this gorgeous stencil using white texture paste.

 
And then adding colour with Distress Oxide inks using a blending tool.

 
These small light bulbs have been waiting to be used again for far too long and are some very old Creative Expression stamps. I added these and some sentiments too.
 
This however is a new die but I just had to try it out and it works so well with the stamps.
I have cut it out twise with a black card and a rusty metalic card, layered them together adding Stickles Glitter glue to the filament.

 
But obviously that is not enough!


So I added some embossing with a text stencil.

 
That's more guilt for having this gorgeous stencil hardly used.


Luckily this is still workable which is good as it is several years old which proves it's worth buying quality products.

And so to the finished journal page.
 
 
This is unusual for me as I am not a lover of yellow but I love the way this looks.
 

I've added a sentiment made on my Dymo Letratag, a very useful little machine.

I would love to hear your comments.

Many thanks for stopping by and happy crafting,

Angela x

Monday, 10 May 2021

Masterboard Monday - Use it or Lose it.

  Welcome to all my new followers, hope you enjoy the journey.

I am here today to show you a card made with some left-over Masterboard and the new stamp set by Lisa Horton:


This looked like a good chance to get out those left-over papers again.

I started by stamping the bottles on Vellum and heat embossing them. 
I've cut a small slit in the background paper so that the bottle could be placed into the water giving the effect of the waves splashing around it.


The background to this card was a piece that I had coloured with some Tim Holtz Distress Oxide Spray but it ended up in the scrap box and this looked like a good time to get it out.
I used the stencil that comes with the set to create the waves applying ink first and then Mixed media Galaxy Souffle by Craft Box.
The little fish were cut using a die set by Marianne Craftables on another sprayed paper this time it was Cosmic Shimmer Mica spray. 
I just find it difficult to throw these papers away but need to have a clear out so it's 'use it or loose it'!
Both the stars and the sentiment are in the set too.


Of course I had another play with this set but this time started by stamping directly onto the card blank. 
I turned the bottles over and coloured the cork with a dark brown alcohol ink pen.
The rolled up letters were tied with black cotton and left loose so they can move around.
I used Tombow glue just around the edge of the bottles and on the back of the cork and glued them down. I like the Tombow glue as it dries clear so works well with the Vellum.
The rope stamp was from a different set but works really well here as a finishing touch.
Finally I added the small shiny gems.


I love the vellum on a design like this as the background shows through. 
I have also added a small amount of Stickles Glitter Glue on the bottles to give the impression of the sparkle as the waves touch the glass.

There are far more stamps in this set than I've used today so I'm sure they will appear again soon.

I would love to hear your comments.
Many thanks for stopping by and happy crafting,

Angela x

Sunday, 14 February 2016

Masterboard Monday and That Craft Place Challenge

Welcome to all my new followers, hope you enjoy the journey.
And here is my new design for :
That Craft Place Challenge Blog.

As usual this fortnight's theme is:
Mixed Media Anything Goes!
So lets see what you can come up with!

But before you start here is my piece using a variety of products from That Craft Place.


I started by making a Masterboard using mica sprays and crackle paste through one of my favourite stencils - 6x6 stencil: Hearts
from That Craft Place.


The MDF heart is also from That Craft Place and comes in two parts:

 
For this project I have only used the frame section as I have other ideas for the solid heart.

I then used this as the background for my heart hanging.

 
To complete this project I used three different techniques with the heart stencil which included Dry Embossing, Crackle Paste through the stencil and Foiling over 3D paste, one of Tim's (Holtz of course), techniques from some time ago which I have always loved. It gives any project a great Industrial Look.
 
If you would like to see the full details of how I made this and the techniques I used I will be doing a tutorial at That Craft Place blog and will post the date and link here soon.
 

I look forward to seeing your entries for the challenge at the:

Many thanks for your comments
and
happy crafting,
Angela x


I would like to enter this project in the following challenges:
 
 Eclectic Ellapu: Love Actually 
 SanDee and Amelie's Steampunk
Country View Challenges: February Make Your Own Background
Anything but Cute: Challenge# 10 - Grungy Love
That's Crafty: First Love Challenge
Rhedd's Creative Spirit: February Challenge
A Vintage Journey-February Challenge-Industrial

Friday, 10 January 2014

Birthday Card

Hi Bloggers, we have a special birthday coming up for a member of the family.
It will be a 1st birthday celebration so had to make a card.

It's not very often that I make pretty cards so it made a nice change.

 
This close-up shows the embossed detail clearly.
I finished her shirt off with a little stickles glue, think you can just about see the glitter.
Very girly. I think?
Lots of pink lol!

 
Hope you like it.
Back soon.
Big Crafty Hugs,
 
Angela x

Monday, 5 August 2013

Masterboard Monday

Hi Blogtonians more masterboard today and one I made for the envelope swap.


This is the masterboard with a close-up showing the detail.
It was made with a combination of clear embossing then swiping ink off the craft mat and stamping.


Here is the finished envelope with ATC and Bookmark.
I have to mention that the cord was taken from a Joules swing ticket.
You wouldn't expect me to throw such a lovely cord away would you lol!


The bookmark and ATC give a clear view of the texture which was created using Texture Paste and then colouring with Gilding Wax, such a nice little gift to add.


The stamps for this were Creative Expressions, Vintage Vixens and Steampunk Sirens and I used Sakura Gelly Roll pens to colour her.


Various embellishments completed the project.


The close-up shows the Stickles Glue which I added.
You have to have some shiny bits,
'It's the Law' lol!

Monday, 22 July 2013

Prima Doll Stamps

Hi Blogbuddies, if you arrived from Ali-Craft you will have already seen this project which I completed as part of the Design Team.
If you have arrived by other means you may wish to go over there and see the full posting for this, including instruction for making.

I wasn't sure when I received this stamp that it was quite my thing but having used it I am really impressed.
These are real quality stamps and give a very clear impression but not only that, they are great fun to use.

Though great images in their own right, I just had to alter them a little.
So here goes!

I am an absolute sucker for anything Steampunk or Gothic so had to give it a go.

      This is the stamp I received

 
and this is the finished design
 
 
and a closeup of the pretty lady.


Hope you like her.
Angela x


Sunday, 14 July 2013

Artist Trading Cards

Hi Bloghoppers hope you have had a nice day today.
Just wanted to show you one of my favourite ATCs.
They seem to have gone out of fashion a little recently but I still love making them and continue to swap.
They also make great toppers for cards.


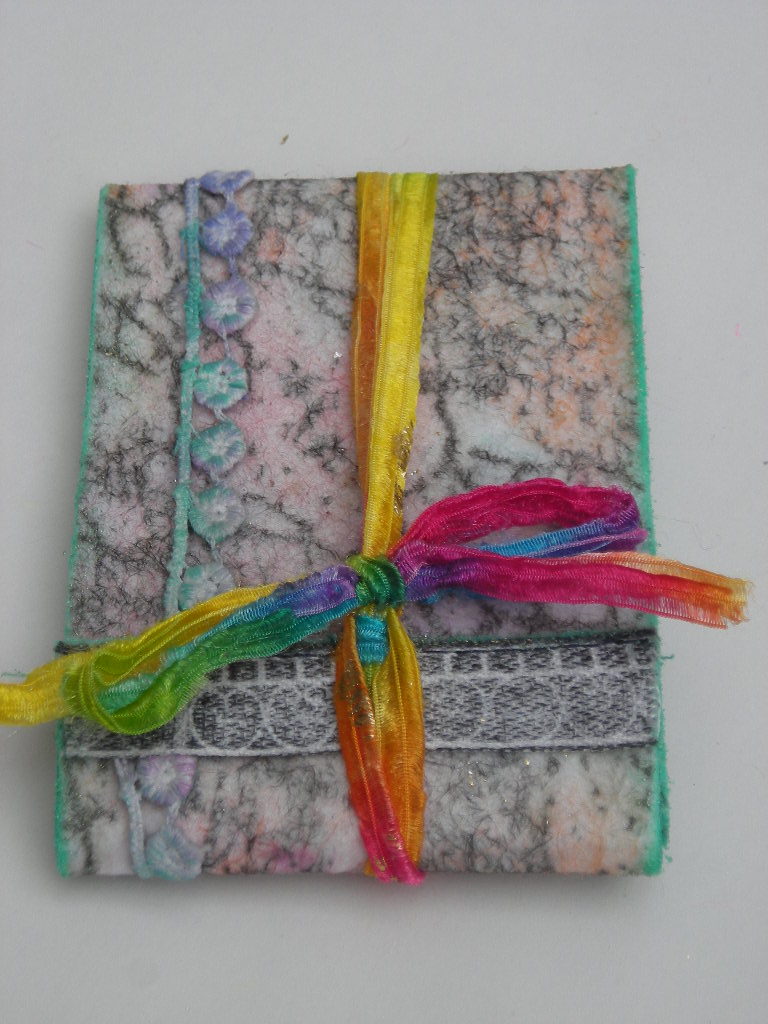
This ATC is a little bit different to my usual type, in that it is stamped on silk for the ATC and felt for the cover.
The stamps used are by Crafty Individuals and the inks are Fabrico (It is best to heat set these) and Perfect Medium.
You will also need a clear embossing powder.


To create the background on the silk I wanted a resist which I made by using the crackle stamp and Perfect Medium. I applied the embossing powder and heated this.
I used a variety of colours on the background and then sandwiched it between two sheets of newsprint and ironed it to remove the embossing.
I then stamped again with the crackle stamp and the thistle in black.
The button was also a Crafty Individuals date stamp.

 
For the felt, I also used the crackle stamp after applying colour to the background. A length of ribbon was used with the border stamp. Ribbon and lace completed the design.

Hope you like it.
Angela xxx

Saturday, 6 July 2013

Ali-craft blog challenge

Hi Blogettes  hope you enjoyed viewing my tag card on the Ali-Craft blog.
All the stamps used are Kaisercraft which are available from Ali-Craft.

It's time for the 2nd Challenge on the Ali-Craft blog today and we have a lovely theme this month based on 'Butterflies', I have used the Kaisercraft Vintage stamps which are available from Ali-Craft.‎


.
                Just a few extra views for you and hope you like them.
I started off by making a masterboard which I used for the tag backgrounds. I am a bit of a technique junky. I adore patterned paper but sometimes find it restrictive and end up making my own background papers.
About this time of the year when the weather is nice I like to go outside and spend time spraying sheets of A4 paper in various colours which I then store ready to us later. I often use Mica sprays as they give a lovely glow to the paper.
 I also keep the sheets used to cover the table I have worked on as they always end up covered with a multitude of colour.(We can't go wasting these sheets as they can prove useful).
It's difficult to throw things away but I know you will understand lol!
I used a Prima mask, available from Ali-Craft, to create the dots by applying stencil paste with a palette knife, allowed it to dry and then rubbed over this with gilding wax and stamped on the background with similar colours to the background to add texture though this is a bit more difficult to see clearly.

I stamped the back of the card itself with one of the butterfly stamps with perfect medium and embossed with clear embossing powder to create a resist.
I applied distress inks with a blending tool.
The front was also coloured in a similar way without the stamping.
The button was attached before the tag was mounted.

 I used a variety of sprayed papers to cut out sections of the stamped images and decoupaged these.
I added glaze on the butterfly, bike wheel and the clock to give more interest to the design.
The cord was wrapped around and the tags mounted. The ribbons and crystals completed the design.
I look forward to seeing your entries amd good luck.
Angela x

Blogs I follow

01 09 10