Showing posts with label stampotique. Show all posts

Saturday, 20 July 2013

Instructions for making.

Hi Blogguys and girls here are the instructions for making the Stampotique card.

As always there will be lots of layers so sorry but it's the law 
according to Felix the Crafty Cat!

Equipment needed to produce the Masterboard.

 
Lots of layers there then lol! Again!

 
Draw the pattern for making the house and cut out in stiff card. I like the stuff you find at the back of some envelopes.
Corrugated card for the roof, lovely! Such a great texture.
Then cut the Masterboard, yes I know it's sad but you can make two or copy it.

 
Next stamp several copies of the Stampotique girls and cat on white and sprayed paper.
Tim Holtz cobweb on tissue paper.


Prepare the border and roof canopy. I used the Face Art stamp from Studio 490 using just the top section.


Pour the Utee onto the heat proof mat and stamp into it, wait for it to cool and then remove the stamp. I applied metallic rub-ons. I attached this to the paper with Hi Tack glue.

 
The walls were stamped with Crafty Individual crackle stamp ( I must use this so much!), on card that had already been sprayed.
Then emboss with Tim Holtz embossing folder.
More colour can be added to enhance the effect.
 
 
Now it's time to construct.
Further detail added in the form of smoke and fencing.
Emphasise the faces with 3D Crystal Lacquer and Stickles.
The label was computer generated.
 
 
The cat's wings were fusible film, stamped with a wing stamp.The moon was made using friendly plastic and a push mould and enhanced with metallic rub-ons. And there you have it.


 Angela x


Friday, 19 July 2013

Stampotique

The front sections of the Stampotique card.


The walls are made using a Tim Holtz embossing folder, the roof is corrugated card from an old box (always useful, old boxes lol!), the fencing is a Tim Holtz die and the smoke was a flourish die - cut from Maya Road.


And look who was hiding inside!
 
 
Just to finish the back, a slider for the Kitty (maybe that's who she had lost) and a rather large spider which I cut using my Slice Machine.
The moon was made using a mould and friendly plastic.
Well that's it for now folks, back soon.
Angela xxx
 

Thursday, 18 July 2013

Stampotique

Here is the full card as viewed from the inside.


You should be able to see clearly now the section of the Masterboard used.
And just a little tease for you, a small section of the outside, the rest will follow.


Wednesday, 17 July 2013

More Stampotique

Here is another section of the Stampotique card.

 
          I love the sewing lady, she reminds me of myself.
The faces above were made by stamping into melted Utee and then glued to the background.

 
More to follow.
 

Tuesday, 16 July 2013

Stampotique card

Just to get started , here is part of the card I made using the Masterboard posted earlier.
If you like it please call back, more to follow.

I altered the girl slightly by adjusting the legs and adding the hat.The stamp used for the row of faces is also stampotique, the cobweb was a Tim Holtz stamp on tissue paper and then glued to the background. The border stamp is from Ranger and was stamped onto a background which had been sprayed with Cosmic Shimmer Mist.
I included areas of crackle glaze to add to the texture.

Monday, 15 July 2013

Masterboard Monday

Hi Blogmates I have decided that Mondays are going to be Masterboard Day.
I promise to show you some of the things I have made using the Masterboards but they may follow later depending on time.
It always seems a shame that we make these Masterboards and then have to cut them up to use them which means the original work is lost.
Although they are not quite the same when copied, I have started scanning them into my computer and printing them off for further use.
I make my Masterboards on A3 paper and though I do not have an A3 printer, I still find the designs useful as A4.

So here is the first of many.

 I made these Masterboards for a project using Stampotique stamps.
 The papers were made with sprays, stencils, stamps, masks, sequin waste, crackle paint and tissue paper.
 I used a variety of inks but mostly Tim Holtz Distress Inks and Ranger Archival.
This was completed in the same way but giving a slighted more muted effect.

Hopefully you will get to see the finished product tomorrow.
Bye for now.
Angela x

Wednesday, 3 July 2013

Stampotique Card

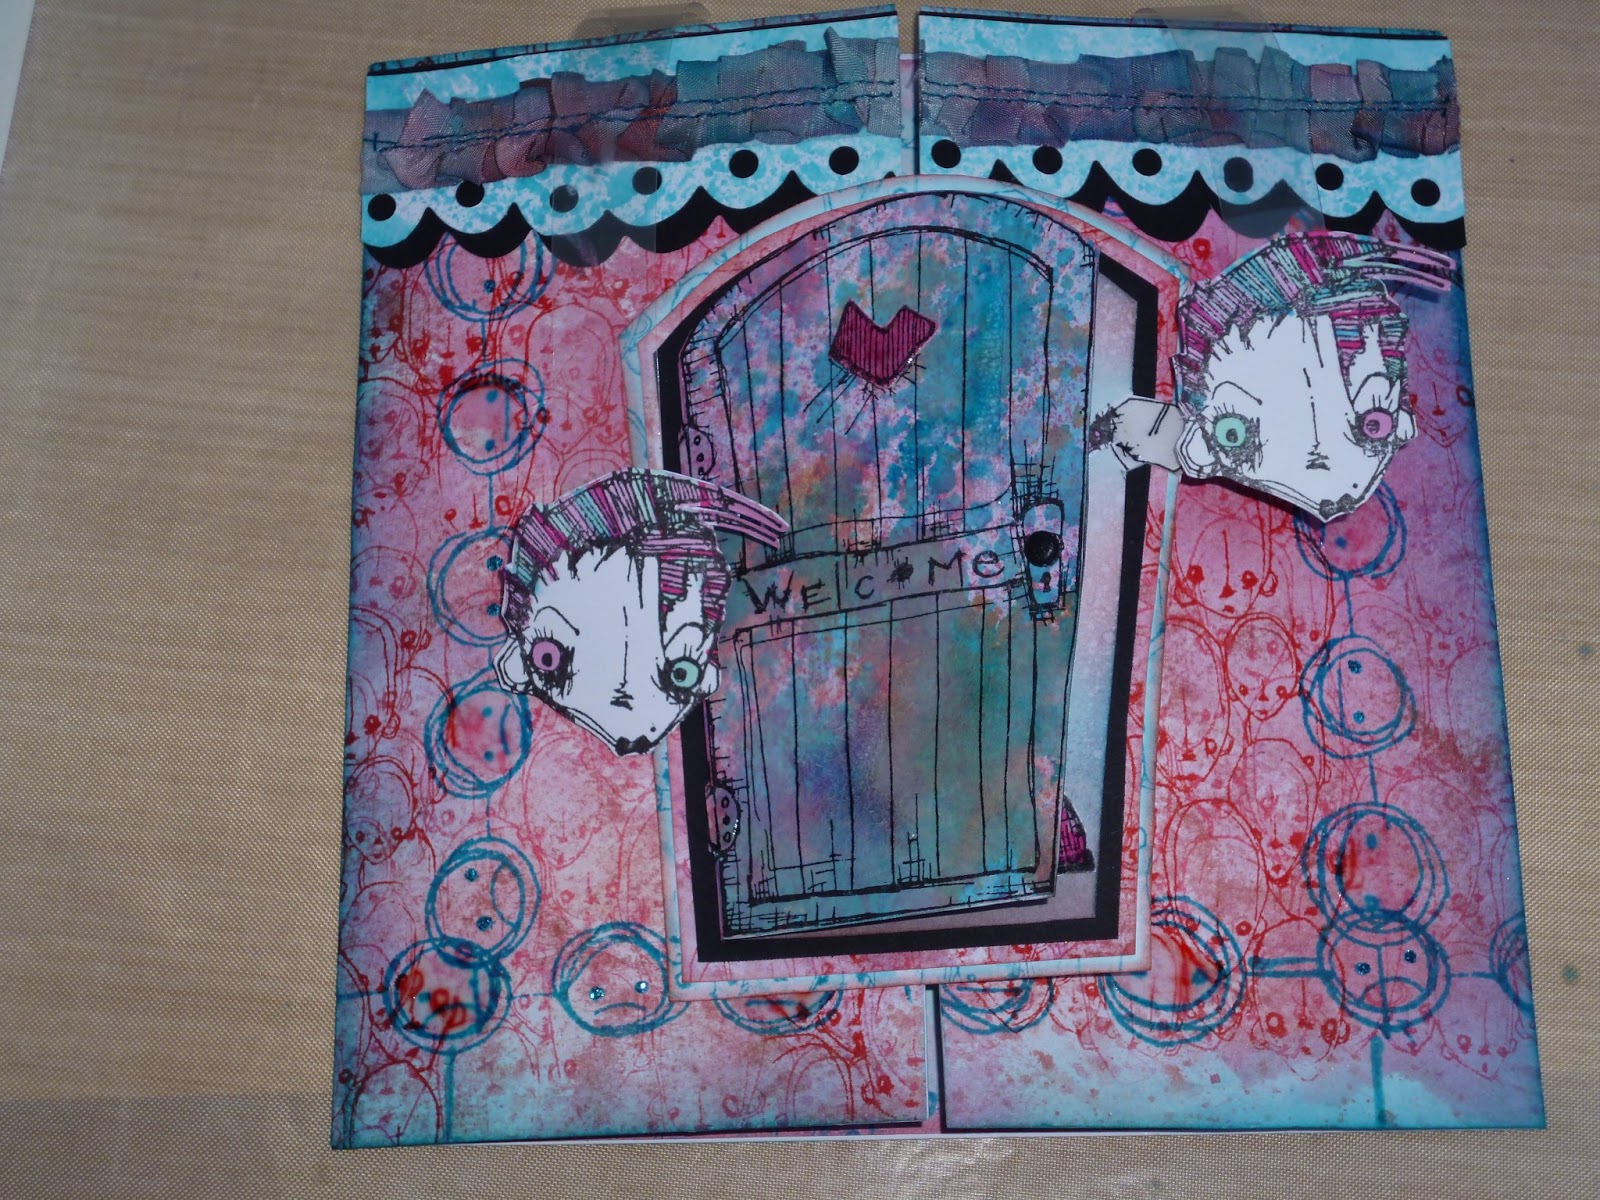
Hi Blogging Friends as promised here are the pics relating to the card posted yesterday. Hope you like them, any comments gratefully received.

                                                         So that's who was inside.

The faces are hanging from acetate which is suspended between the border and the main card.

The background paper was made by spraying and stamping using various Stampotique stamps and the top border was cut out using a Tim Holtz die and machining on a piece of ribbon which had been dyed with the same colour inks to match the overall colour scheme.

 
I do so like a nice finish to the inside don't you?
 
 
                                             And of course a good finish on the back.......

 
and a nice envelope to send it in.


Monday, 1 July 2013

Been a bit busy today!

Hi Bloggists hope you have all had a nice day the weather has been lovely here.
It is rather late and I have another busy day tomorrow so this is just a quick look of what I have on offer next.

 
This is one of my favourite cards with stamps from stampotique, can anyone possible resist them!
 
Someone's hiding behind the door waiting to appear but he will have to stay there until tomorrow as it's far to late to complete this blog.
Back tomorrow
Angela x

Blogs I follow

01 09 10