Showing posts with label Testing techniques. Show all posts

Wednesday, 19 January 2022

WOYWW - 659 - What's On Your Workdesk Wednesday.

 Welcome to all my new followers, hope you enjoy the journey.


Hi Workdesk friends. 
We are here for another Wednesday at the Workdesk and here is:
"What's on my Workdesk this Wednesday".


If you don't know what this is all about then please visit the
 
Stamping Ground, our host Julia will explain.


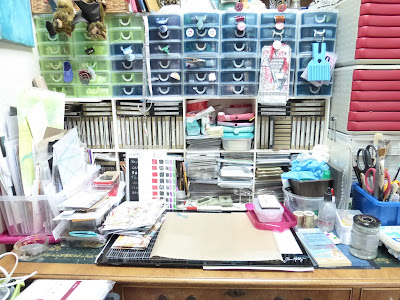
So here is my desk for today!


Desk looking tidy but only because I've just finished playing with those white pens, more to follow.


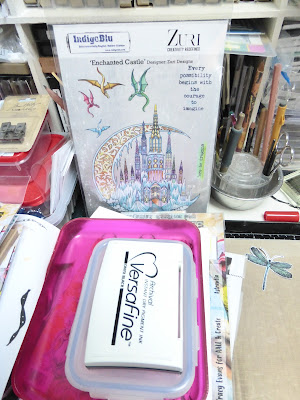
New stamp set from Indigo Blu by Zuri.


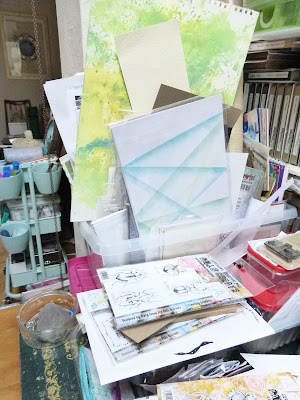
Exploding box near to explosion! A sample of the Retiform pattern and in front of that and some AALL and create stamps and dies.


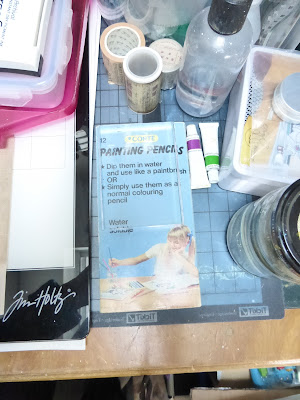
The old ones are often the best and these are some old pencils that I've had for a very long time and above those some new washi tape.


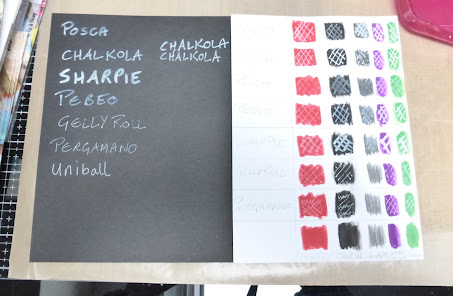
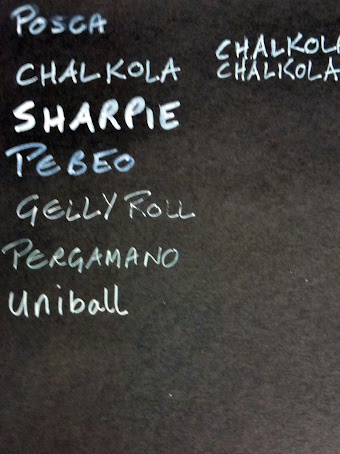
I had a play with the new white pens and a few others to give an idea of how they performed.
They all work quite well on black card though some show up whiter than others.
If you're wondering why I used the Chalkola twice on the right it was because it came in two sizes but to be honest there didn't seem to be much difference between them.


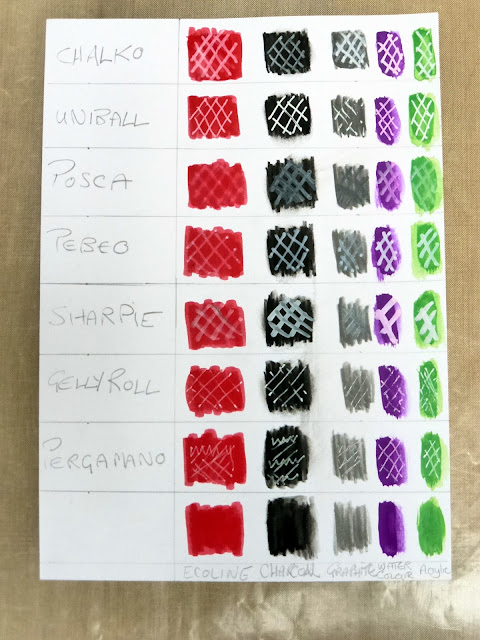
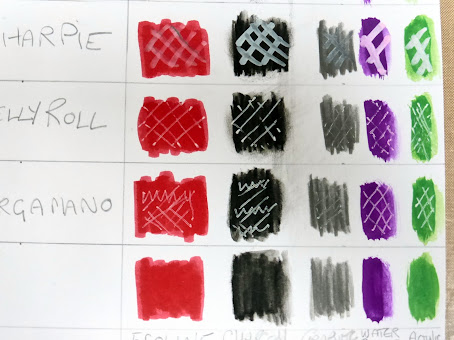
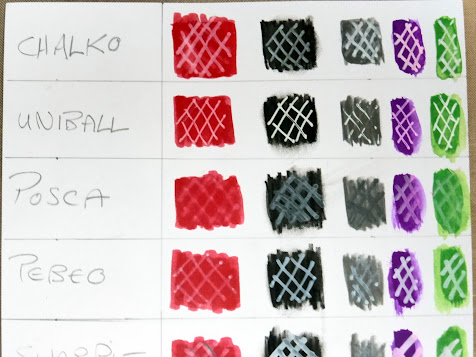
So then I went onto some markers, pencils and paint to see how they performed on top of these.


The Chalkola which is the new pen did work quite well on all the marks and in fact was the only one that worked well on the graphite. 
The Uniball worked the best over charcoal pencil and pretty good over the others except the graphite.


The Sharpie always looks nice and white but it is quite a thick nib.


I'm still in favour of the Uniball pen and there wasn't much difference between the two again apart from the Graphite so if you think you will be using it then the Chalkola is a good option.

The Pergamano and the Gelly Roll were my least favourites with the Posca next which I was surprised about as it seemed fine on the black card. 
Then the Pebeo and the Sharpie with the Chalkola and Uniball taking top slot.

So that's me done for today and hope that might have been some use.

 Thanks for stopping by and hope you will pop over and join in the visits around the other desks.

 I'm off now to see what everyone else is up to.
Have a great woyww 
and 
happy crafting,


Angela x

Friday, 6 November 2020

Friday Fun Day with Smiles.

 Welcome to all my new followers, hope you enjoy the journey.

Angela here again to show you what I've been up to this week.


This was my first visit to the craft club since January and sadly probably my last this year as we wont be able to do it again for a while.

You can see from the photograph how organised we've been with the tables at the required distance. Everything cleaned down before and after and we were only allowed to remove masks when sitting.
It was lovely to see some of the ladies again though obviously a lot less than normally.


I decided this would be a good time to start some Christmas card ideas so took my new Tim Holtz stamps.


 And now to the garden.
The Maple (Acer) Bonsai started to turn red a couple of weeks ago, so pretty.


And now it looks like this.
I actually think that it's when it looses it's leaves that you can really see it's true tree shape and the branches are ready for a prune before the winter starts.


As you can see this was a lovely sunny day though it's not been like that much this week. 


I've also been having fun with some rusty nails and wrapped them up in some cotton calico and hung them outside.
You will have to wait to see the results.


Lots of screws and nails plus a few other bits.


Nice piece of washed Calico and rubber gloves.


Wrap it all up, wet it thoroughly and tie with cord then hang it up outside and wait for the magic to happen.

And of course I can't go without offering you a few dog themed smiles.


And if you would like some more smiles you just need to pop over to see what our other friends have been doing this week at Annie's for
"This Week's Smiles" and you can share your  smiles too.

Take care and hope you have a lovely weekend.
Leave me a little comment then I can pop over and see you.

Thanks for stopping by.

 Angela x


Wednesday, 15 July 2020

WOYWW -580 # What's On Your Workdesk Wednesday.

Welcome to all my new followers, hope you enjoy the journey.

Hi Workdesk friends. 
Here we are for another Wednesday at the Workdesk. 
I am here again to show you:

"What's on my Workdesk this Wednesday".

If you don't know what this is all about then please visit the 
Stamping Groundour host Julia will explain.


So here is my desk for today!


In the centre is a new magazine with free die and next to it on the left are the moulded pieces for the tube box. 
To the right is a tub of Gesso, a box full of ...well all sorts of gloves and cleaning cloths, the little red spotty box has some paper clay in it. 
The box to the side of that has card with numbers and letters and below it the all important Huggies.

On the left side of the magazine the box holds some moulded pieces waiting to be added to the tube box.
The box next to it holds lots of sample pieces.


Since we were thinking about all those UFOs I've been sorting some boxes hoping to use up some half made projects and found these.


I originally put these together as samples but thought it would be nice to make some of them into cards.


One of my favourite techniques that I've not done for ages. I've stamped the Tim Holtz stamp onto black card and embossed it with gold powder and then stamped into UTEE which had glitter flakes and mica powder mixed in it.


When the UTEE has cooled and set I've glued it to the heat embossed card so that parts of the stamped image are still showing.


Same idea again using half of the stamped UTEE which was coloured with mica when cool.

Who knows I might even get these made into something soon.

You may notice that to the left of this is a new exploding box full of stuff, let's hope it doesn't explode!

  So that's me done for today.
Sorry still not got round to using the salad spinner as I've been a bit distracted with a few things but don't worry I will show you when I get round to it. 
If you would like to see one of the things I've been distracted with it's here.

 Thanks for stopping by and hope you will pop over and join in the visits around the other desks.

 I'm off now to see what everyone else is up to.
Have a great woyww 
and 
happy crafting,


Angela x

Monday, 14 May 2018

Masterboard Monday with a twist.

Welcome to all my new followers, hope you enjoy the journey.

I am here today to show you some testing I've been doing using Starlight paints. My intention is to find out whether these techniques could be used to make a Masterboard, she says hopefully Lol!

I warn you it is a rather long post so I should get a cuppa before you start reading.

You may have seen people doing acrylic pours and I have been looking into the various methods of doing this.

I had been interested for some time and it was when I attended the Sincerely Yours show at Newark showground that I got the chance to try it out.
And here are the other ladies that were there having fun too.


Acrylic Pours being demonstrated on the BJ crafts stand.


As you can see here it is a rather messy technique.

 
Surprisingly No Apron!
So maybe it's not so messy.... no I'm kidding myself Lol!

 
Notice the bottle of liquid, that is a mixture of washing up liquid and water so it needn't cost too much if you already have a collection of acrylic paints and some Gesso though this could be white acrylic paint, just use whatever you have available.
You do need to thin the paint down and an artists pouring medium is good for this but it is also possible to thin the paint with water.
 
What I have realised is that not everyone uses the same combination of mediums to do this or apply it to the canvas in the same way and the effects are slightly different.
Sometimes you may read 'Dirty Pour', 'Acrylic Pour', 'Swipe techniques', 'Cells', 'Puddling' and a multitude of mediums. On top of that depending on how you dry the pour you will get a different finish with that too.
 
So my plan is to try out some of the mediums and techniques on different substrates and we'll see what we end up with and whether it will work for a Masterboard.

 The results are gorgeous and the cracks on these small canvases were created by drying the paint with a heat gun.

 
My initial effort ended here.
 
The canvas was an actual pour and the card and tag were used to swipe the remaining ink from the craft mat where it landed, definitely a possibility for a Masterboard I think.


It's also worth mentioning that the Starlight paints by Imagination Crafts have a lovely sheen to them so also different to some other acrylics.

For my first play at home I used the starlight paints, a good teaspoon full in a small cup and a mixture of washing up liquid and water.
(To make the mixture I used approx. One 3rd wash liquid to Two thirds water).
 I mixed the water and the paint a little at a time until it was nice and runny so it will flow well, about the thickness of single cream.

Put a couple of teaspoons of Gesso in a pot and cover with blending solution, mix until it is a similar consistency to the paint.


Pour the colours a little at a time onto the Gesso until the pots are empty. You can cut into the paint a little with the spoon but don't mix the paint together or you will get sludge as the colours will blend together and become brown.

 
Place the canvas on top and hold it tightly while you flip it over then leave it for a while so that all the paint drops down. Not sure I held mine quite tight enough as the paint seeped out before it should but we all have to start somewhere.


Remove the cup carefully as there will be paint dripping. You may be able to see that I have an old cake rack under mine which I found really useful as the loose paint drips below it and you don't get covered in paint when you pick up the canvas.

 
Lift the canvas and tilt it to get the paint to move around the canvas until it covers it.
Of course there is nothing to say that you want to cover all the canvas.... now there's another idea to try! CAS maybe.


I dried this using a heat gun and did get some interesting cracks appearing.


Although the golden yellow shows it is not easy to see here but I used some of this around the edge of the canvas with a dry brush when everything was set.

 
As much as I like this I think I need more practise and I have a feeling that this canvas may re-appear again sometime as the background for something else but not sure yet.
 
Back soon with even more technique fun so just watch this space.

I would love to hear your comments.
 
Many thanks for stopping by and happy crafting,
 
Angela x
Sunday, 11 January 2015

Playtime with Fabrics.

Welcome to all my new followers, hope you enjoy the journey.

Hi friends, hope then new year is good for you so far.

Those who know me will be aware that my background is in Textiles and although I love working with other materials I cannot help going back to the fabrics, however this does not necessarily mean just sewing as there are many things that you can do with them and I hope to show you a few of the techniques I like to do.
To start this, I have been using my heat gun.

I've been having fun playing with a variety of Synthetic materials and thought you might like to see what I've done so far.
Synthetic fabrics are amazing stuff to play with and you never know exactly how they will behave but you must be careful not to heat them too much or you can end up with nothing left Lol!
These materials shrivel lovely (Shrivel is a technical term obviously Lol!).

So here is a sample I've made and the materials I've used.
I like to use a cotton backing as this stabilises the fabric and then layer up other fabrics to add different texture and colours.
These fabrics are machined together in any stitch but I used straight stitch for this piece and I layered together Nylon net and Polyester Organza.

 
This is what the fabrics looked like when complete and ready for heating.


 And here is what happens when you heat it with the Heat Gun.


If you were here on Wednesday you will remember the small sample on the right and the large one on the left, I have been playing with here.
 
 
The tub at the back contains some pieces of Tyvek but that's for another day.
 
I hope you enjoyed that and I look forward to showing you what else I have been doing, who knows, I might even make something with the samples.
 
If you have the time, please let me know what you think about the techniques, I would love to hear from you.
 
That's it for now.
Happy crafting,
 
Angela x

Blogs I follow

01 09 10