Showing posts with label masking techniques. Show all posts

Wednesday, 31 July 2024

WOYWW -791 - What's on your Workdesk Wednesday.

   Welcome to all my new followers, hope you enjoy the journey.

Hi Workdesk friends. 
We are here for another Wednesday at the Workdesk and here is:
"What's on my Workdesk this Wednesday".


If you don't know what this is all about then please visit
 Sarah's Craft Shed and our host Sarah will explain.

So here is my desk for today!


So today! 
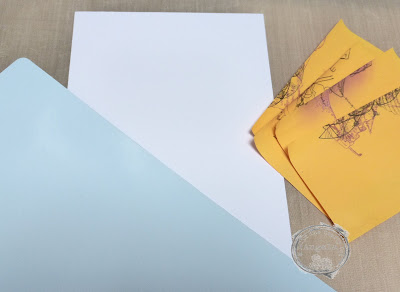
well I'm working on some A4 Masterboards.
The exploding boxes are just about surviving!


I'm also printing the back of one of these too.


I've used 'Lavinia Stamps' Stencils for these designs and Tim Holtz Distress Oxide inks.

Hopefully by next week I can show you what I've made with them.


This was one of the stencils.


I bought this set of stamps on Saturday when Jo Channon came to the Craft Club to teach a Tutorial.
I'm thinking I might use it on this project but we'll see. The stamps behind it are an old Tim Holtz set.

So that's me done for today.

 Thanks for stopping by and hope you will pop over and join in the visits around the other desks.

 I'm off now to see what everyone else is up to.
Have a great woyww 

and 
happy crafting,

Angela x

Monday, 13 December 2021

Masterboard Monday.

   Welcome to all my new followers, hope you enjoy the journey.

I am here today to show you a card made with this Masterboard:


If you think this is not finished you'd be right.
I'm writing this post for all those lovely people who've told me that they are not familiar with the Retifom technique. 
The term Retiform refers to anything net like, an example would be the the connective tissue cells of the framework of the Lymphatic glands but enough of that so let's get on with the fun bit Lol! So the process is simple but maybe a little time consuming to make a Masterboard with this technique. 
You sure will have fun with the finished project.


You are going to need some Sticky Post it Notes, stamping card (this sample piece is A5: 148cm x 210cm) and a piece of stiff card for the blending process.


I've used three colours of Oxide ink but you can use just one or more if you wish. You know what...it's up to you!


With the first section you may wish to leave a blank area to add a sentiment later.


And now it's time to create the pattern.
If you find the card moves you can use the sticky notes here too but I find it quicker this way especially when working on a Masterboard.
Hold the card firmly and then blend the ink upwards towards the white card. 
Tip: don't add too much ink to the blending tool.


This is the type of finish you are aiming for.


And now it's time to start the stamping. 
Use the Sticky Postage Notes to outline the area where you are going to stamp. I'm using a variety of AALL and Create stamps for this project.


Stamp your chosen image and then remove the sticky paper and move to the next space.


Continue with this until you've filled all the sections.


I trimmed the card down, added a sentiment and edged it with a matching ink.
Next I layered it with two colours of plain card finishing it with some Stickles Glitter Glue.


I'm back to the A3 Masterboard and I'll show you next week how I finished it.

Hope you enjoyed watching me make this.

I would love to hear your comments.

Many thanks for stopping by and happy crafting,

Angela x

Sunday, 1 June 2014

Masterboard Monday

Hi Blogbuddies, it's been a while since I posted Masterboard Monday due to the slot being taken up by other things.
However today I have a Masterboard to show you which was a swap I did with a friend.


I so wanted to make her something special with it and this is the result.


I am entering this in the Compendium of Curiosities Challenge 3
Faux Tea Rose Technique.
This month they are being sponsored by: Inspiration Emporium with a chance to win a $50 Gift Certificate.


These are the stages in making:

I started with a piece of corrugated card which I painted cream with acrylic paint.
I then used various masks to apply pattern and colour as you can see below.


Next I ripped up some strips of the masterboard and edged them with distress ink.


After attaching these to the card, I used a mask to apply a corner using embossing paste.
I didn't have exactly the colour I wanted so I mixed the two together which resulted in the one at the far left.


Then I went on to making the flowers using  Tim Holtz die.
Again I used the masterboard and edged the petals before starting to curl the flower.

 
I used Stickles glitter glue to add texture and shine to the petals.


This die is actually a Fir Cone but makes lovely roses.

 
And the final piece.
I used some Tim Holtz metal findings to complete this and also some skeleton leaves, ribbon, crystal gems and pearl butterflies.
 
 
Here you can see a closeup of the flowers.

 
This picture shows clearly the text which was applied using a 6x6 Crafters Workshop mask with grunge paste. When this was dry, I rubbed over it with gilding wax.
A couple of pins complete the butterfly which was die-cut using a Spellbinders die and I used a Tim Holtz pen nib for the body.

 
The skeleton leaves are quite delicate, here they are below.

 
I do hope you enjoyed this project and maybe have a go at making your own Masterboards if you haven't already.
There are so many techniques that can be used to make a Masterboard, be it stamping, stencilling, masking, embossing, resist methods, spraying the paper, collage and so it goes on, whatever is your chosen technique.
The great thing is that you can make it how you like using the colours you like best.

And when you have finished making your Masterboard you can turn it into any product that takes your fancy, punch or die cut it.


That's it for now so happy crafting.
Back soon,
Angela xx


Monday, 7 April 2014

Masterboard Card Ideas.

Hi Blogbuddies  back with more ideas for using the Masterboards.
Remember this one?
It was made by my dear friend Gloria and was part of our swap project.
This is the first of the finished products I have made.


A Greetings Card and ATCs.
 
I used some striped paper for the inside of the card and on the folded front closure.
There was so much detail on the Masterboard that it required very little else adding to it.
First, I placed black gems in the corners of the card and stickles distress glue on the butterfly's wings.
Added paper lace and butterflies on the ATCs.
 
 
Next, I added a dragonfly embellishment and a Tim Holtz Epoxy sentiment sticker to the greeting card.
 
 
Close-up showing the finished card.


Back soon with more Masterboard goodies to show you.
 
Happy Crafting,
Angela x

Blogs I follow

01 09 10