Sunday, 7 July 2013

Leftover Paper

Hi Blogsters lovely day here again.
These flowers are made from waste paper left over from one of my spraying sessions. This is so simple and quick to make but sometimes these kind of cards are necessary. I like it anyway lol! Hope someone else does?

 I used the flower stamp first to create a simple background effect and then stamped several times onto the sprayed paper, cut these out and layered them up finishing off with Stickles and crystal stickers.
The inside is consrtucted to create a simple border into which I stamped the message.

Flower stamp used is by Stampendous.


Angela x
 
I am entering this for the Simon Says Good to be Green challenge.

Saturday, 6 July 2013

Ali-craft blog challenge

Hi Blogettes  hope you enjoyed viewing my tag card on the Ali-Craft blog.
All the stamps used are Kaisercraft which are available from Ali-Craft.

It's time for the 2nd Challenge on the Ali-Craft blog today and we have a lovely theme this month based on 'Butterflies', I have used the Kaisercraft Vintage stamps which are available from Ali-Craft.‎


.
                Just a few extra views for you and hope you like them.
I started off by making a masterboard which I used for the tag backgrounds. I am a bit of a technique junky. I adore patterned paper but sometimes find it restrictive and end up making my own background papers.
About this time of the year when the weather is nice I like to go outside and spend time spraying sheets of A4 paper in various colours which I then store ready to us later. I often use Mica sprays as they give a lovely glow to the paper.
 I also keep the sheets used to cover the table I have worked on as they always end up covered with a multitude of colour.(We can't go wasting these sheets as they can prove useful).
It's difficult to throw things away but I know you will understand lol!
I used a Prima mask, available from Ali-Craft, to create the dots by applying stencil paste with a palette knife, allowed it to dry and then rubbed over this with gilding wax and stamped on the background with similar colours to the background to add texture though this is a bit more difficult to see clearly.

I stamped the back of the card itself with one of the butterfly stamps with perfect medium and embossed with clear embossing powder to create a resist.
I applied distress inks with a blending tool.
The front was also coloured in a similar way without the stamping.
The button was attached before the tag was mounted.

 I used a variety of sprayed papers to cut out sections of the stamped images and decoupaged these.
I added glaze on the butterfly, bike wheel and the clock to give more interest to the design.
The cord was wrapped around and the tags mounted. The ribbons and crystals completed the design.
I look forward to seeing your entries amd good luck.
Angela x

Whoopeee!

Hi Blogdoods as some of you will be aware, I have been asked to join the Ali-Craft Design Team and what can I say but whoopeee! I am delighted at the prospects and can't wait for my first samples to be posted on their blog.

For tonight I just want to show you that I can make pretty things and this is a baby journal which I made recently for my God daughter's baby.
Hope you like it.


Pretty or what?


    Not quite all the pages but enough to give you the idea.

Wednesday, 3 July 2013

Butterfly Girl

Good evening Blogging Friends, hope you have had a nice day today.

 
Something a bit different tonight and another little something I made for my dear friend Gloria.
I made this by producing a Masterboard on sticky back canvas and then cut it out using the Spellbinders Grand Shapeabilities:
  Jewel Goddess die. 
 
The stamps are by Chocolate Baroque and are Patchwork Butterfly.
I used the largest stamp to create the wings with Angelina fibres, which I then cut in half and later stitched into the seam of the body section. 
The earrings and other embellishments were made from shrink plastic.
That's the great thing about stamping, one stamp and so many different techniques! Love it! Love it! Love it!
The earrings are attached with a safety pin from the Tim Holtz range.
The stand is by Indigo Blu and has been painted with acrylic paint.
The ribbon is sewn into the seam to complete the effect.
 
Hope you like it, please leave a comment if you can.
Angela x
 

Stampotique Card

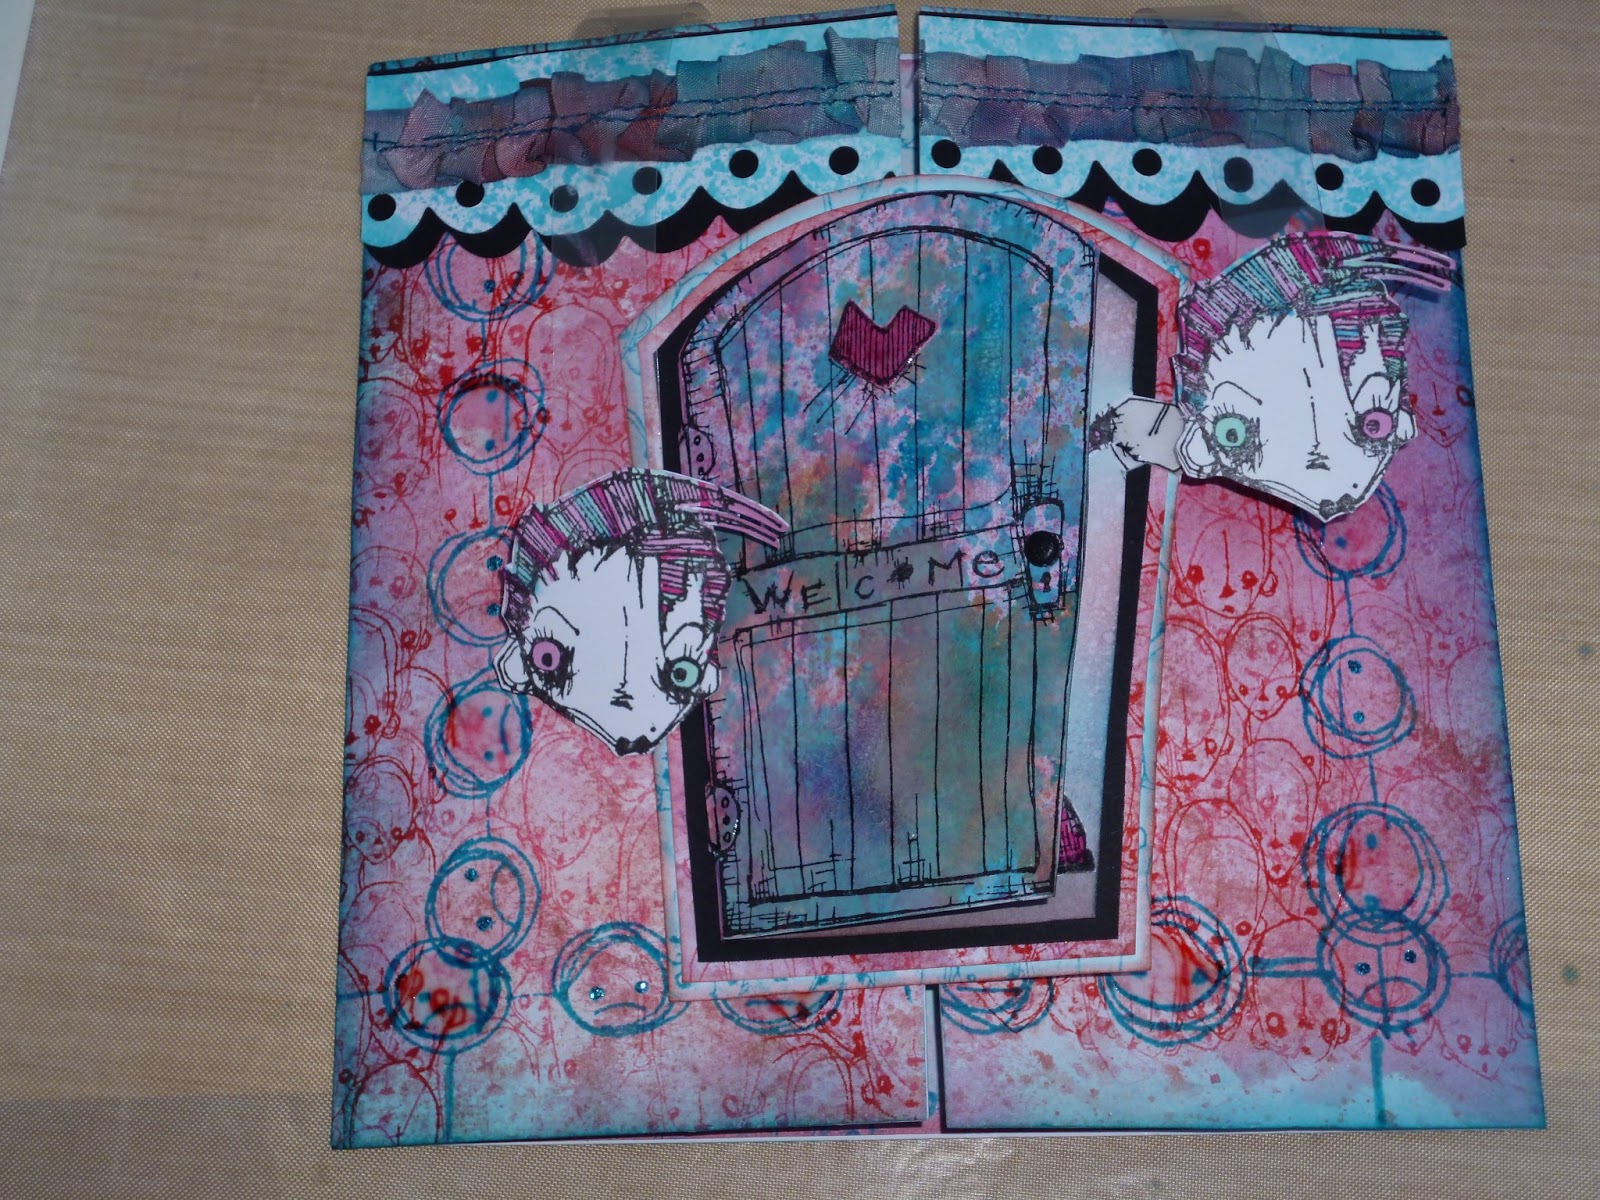
Hi Blogging Friends as promised here are the pics relating to the card posted yesterday. Hope you like them, any comments gratefully received.

                                                         So that's who was inside.

The faces are hanging from acetate which is suspended between the border and the main card.

The background paper was made by spraying and stamping using various Stampotique stamps and the top border was cut out using a Tim Holtz die and machining on a piece of ribbon which had been dyed with the same colour inks to match the overall colour scheme.

 
I do so like a nice finish to the inside don't you?
 
 
                                             And of course a good finish on the back.......

 
and a nice envelope to send it in.


Monday, 1 July 2013

Been a bit busy today!

Hi Bloggists hope you have all had a nice day the weather has been lovely here.
It is rather late and I have another busy day tomorrow so this is just a quick look of what I have on offer next.

 
This is one of my favourite cards with stamps from stampotique, can anyone possible resist them!
 
Someone's hiding behind the door waiting to appear but he will have to stay there until tomorrow as it's far to late to complete this blog.
Back tomorrow
Angela x

Blogs I follow

01 09 10