Hi! back again to tell you that it's time for another challenge over
at Crafty Cardmakers.
Marlene is hosting today and our challenge is Easter.
Hope you will join in.
Turn the card once clockwise and score again at 2 3/4" and 5 1/2".
Reinforce the score lines and it should look like this.
Cut out the shapes slightly smaller than the card blank and edge the pieces with a matching colour before attaching them to the background sections.
I hope you will pop over to see what the rest of the DT have been up to and maybe join in the challenge.
As usual you can enter anything you fancy, it doesn't have to be cards, as long as it meets the challenge.
Hope you will join in.
And here is my project for the challenge:

This is a Tuxedo Box card, something I've been wanting to have a go at making.
The scoring is done first at 2 3/4", 5 1/2", 8 1/4" and 11" which will leave you with a small strip at the end.
This is a Tuxedo Box card, something I've been wanting to have a go at making.
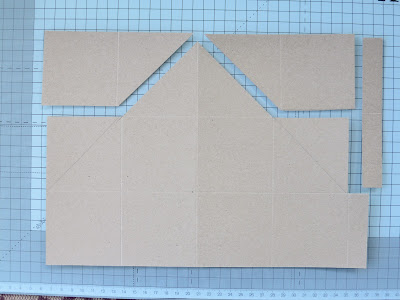
Turn the card once clockwise and score again at 2 3/4" and 5 1/2".
I marked this with a pencil those parts that need to be removed and scored.
This probably makes it easier to see the stage.
Reinforce the score lines and it should look like this.
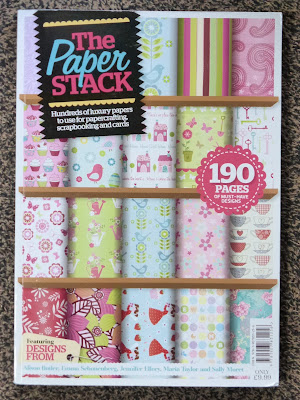
It's not often I do this but I have had this book for ages so decided it was time to use some of the papers.
Cut out the shapes slightly smaller than the card blank and edge the pieces with a matching colour before attaching them to the background sections.
The flaps are used to hold the embellishments.
Cut these 3/4" wide by 3 3/4" in length and fold 1/2" at each end.
Attach these at the side panel as shown then dab glue onto the two loose ends, gently close the card to position the tabs and attach.
Attach double sided tape to the joining flap and attach it to the other side.
Ensure as you do this that the card will lie flat.
It should now look like this.
At this stage you can add the embellishments.
Which are attached to the inner flaps.
I hope you will pop over to see what the rest of the DT have been up to and maybe join in the challenge.
I look forward to seeing what you come up with too.
Happy crafty card making.
Angela x


.JPG)


.jpg)


8 comments:
Brilliant. Not seen or heard of this shape before so it is going straight on my list of to doo’s. Thankyou for the excellent tutorial. Hugs Mrs A.
Very impressive measuring and scoring. Well worth it for a spectacular effect xx
So much love have gone into this Angela what a fabulous card for Easter, love how you shared it's construction with us all, I really do need to try this one out there's so many ways it could be adapted. Really beautiful creation Angela wishing you all a Fabulous Easter.
Stay safe Hugs Tracey xx
Love your tuxedo card, in fact I think I have that egg paper on my desk - which is weird because I think I have had it a couple of years. I'm guessing it came with a magazine. I prefer the tuxedo style to the box cards although I couldn't get my head round the inner 'struts' being on the diagonal. However, I saw a video (possibly from Mixed Up Crafts?) where they used a forward facing strut that curves and then suddenly I cuold make them (I can be a bit OCD at times lol). Stay home, stay safe, stay well, Happy WOYWW Cindy #26
As I read the previous post, I was wondering if that fabulous box was actually a card as well, and here it is! Great tutorial, Angela - many thanks!
Angela what a fabulous card and so clever! Thanks for the great tutorial too. Take care and stay safe, Sue xx
Thank you for the step by step with this glorious card and very creative project. Happy Easter Angela and stay safe and well x.
This has the wow factor, Angela! Brilliant tutorial too, I'm trying to summon the courage to make one! Happy Easter xx.
Post a Comment