Welcome to all my new followers, hope you enjoy the journey.
I am here today to show you a card made with this Masterboard:
It's a while since I had a play with tissue paper so I thought I'd get it out and make some mess Lol!

I started with some die cut pieces of the tissue.
Spray the Watercolour Paper with water and lay the pieces down and spray with water again.
I like to place another sheet of paper on the top as this gives you two Masterboards to work with when complete. At this stage the more you can wet the paper the better.

I have continued to build this pattern up with other pieces of tissue but you can stop at any time. Dry the paper before adding the next layer and then spray the surface with water again. Once the colour transfers it doesn't tend to come off and the same goes for the colour on your hands too Lol!

The top sheet of card always tends to be lighter but you can place something heavy over the top to ensure good connection with the tissue paper.
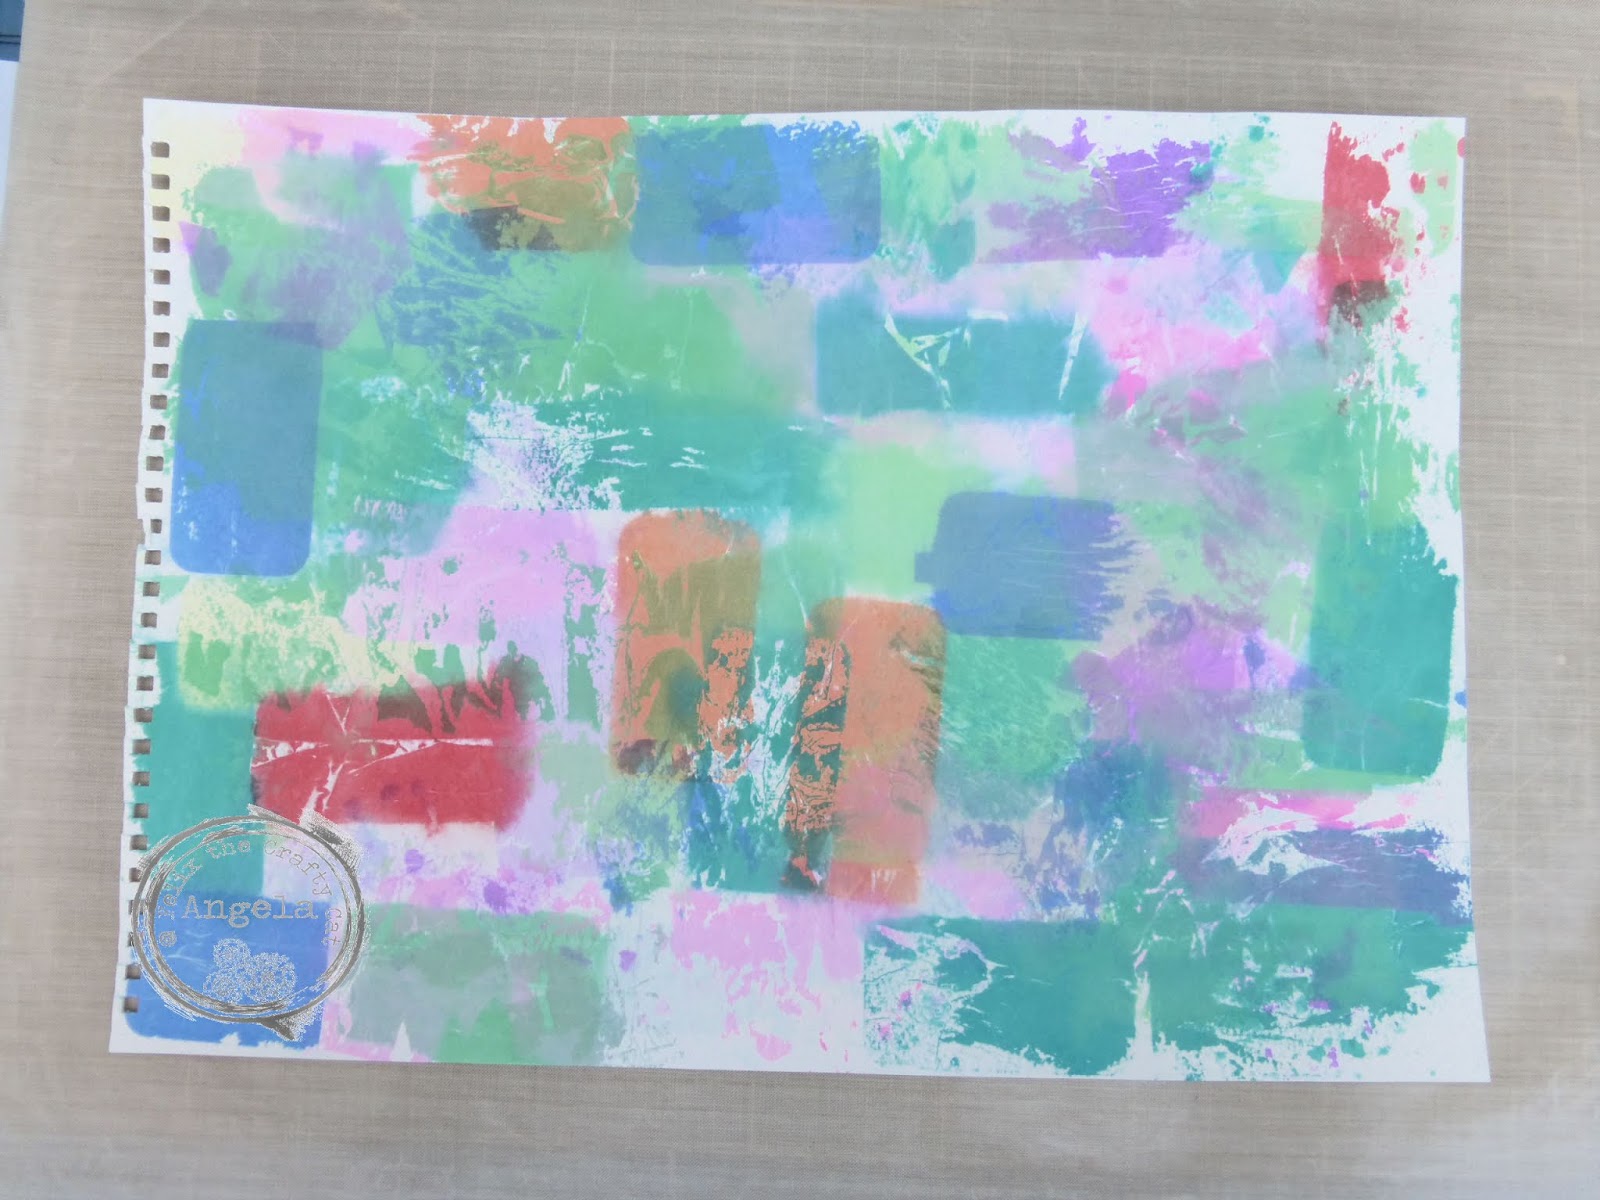
And this is where I stopped.


I decided to use the lighter sheet first to stamp onto.

Using a new stamp by Woodware and of course the all important Stamping Platform.


I have heat embossed this with clear powder.
Now how effective is that!
All we have to do now is mount it onto a card blank.....well almost!
I can't be seen wasting the tissue paper that I removed from the paper so:

I've used it to decorate the card blank.
I like the paper at this stage because the colour looks slightly faded and it blended when wet from one piece to another.


I so love these gems they are so different from the shiny ones and nice and flat too.
Now I have to say this can be quite messy as you need plenty of water and you do need tissue paper that bleeds which is generally referred to as 'Bleeding Art Tissue' though many other tissue papers will bleed and it often warns you of this on the packet so that can be used too.
I would advise a fairly heavy weight of Watercolour Paper too as it's going to get pretty wet. The one I've used here is 300gsm and is available at WH Smith's Book Shop. If you don't live in the UK I'm sure there are plenty of other places where you could get this including Amazon.
I have plenty of masterboard left over and a few ideas and more techniques that I plan to use so expect to see more of this later.
Hope you enjoyed watching me make this card and I would love to hear your comments.
Many thanks for stopping by and happy crafting,
Angela x
I would like to enter this card in the following challenges:
Crafty Catz # 447 Anything goes with optional Twist of Layers.
Craft Stamper Take it Make it Challenge: February - Anything Goes.
Paperbabe stamps challenge 91 'Anything Goes'


.jpg)


.JPG)


.jpg)


.jpg)


14 comments:
Looks brilliant, Angela, Jo x
So enjoyed reading the post and thank you for the step by step on this fun and messy tissue technique. The colours are gorgeous. You've created wonderful cards from the master boards and the remaining tissue too x
I really like and appreciate your post.Thanks Again. Keep writing.
Angela this is brilliant! I love the paper you've created, and the card is fabulous with the stamped tissue paper pieces. That's a really lovely Woodware stamp, I like a nice collage stamp (or 20 lol) I'm a huge fan of the stamping platform too, it's a gadget that I actually use! Have a very happy week, Sue xx
Not a technique I have tried but it looks fun as well as effective! I love the stamp too, Woodware's latest release has many lovely stamps... Your finished card is beautiful Angela. xx
Fabulous Angela. I love Bleeding Art Tissue, very messy but so worth it. A little hard to explain the colour of my fingers the next day at work, but who cares. All done in the name of art lol.
I love adding a little gilding wax to the tissue when I stick it down on card. It highlights the texture and makes amazing backgrounds.
Hugs Kimx
This is so creative! I love how you build up your image with all those different techniques and layers.
Thank you for sharing your talent with us at CRAFTY CATZ. Best of luck with your enry. Nick
I loved seeing your process on this, Angela - you're always such an inspiration!
This hotel is so cute and I will surely try this and put as a design in my room. Thank you.
Great techniques with fabulous results. Thank you for playing along with the Craft Stamper challenge xx
Love these Anlgea, not sure I have right tissues as must sort why bleeds, still one day, love it! Mind you left over inky paper towel works like this too, and have plenty of it!
Happy belated WOYWW,
hugs Shaz in Oz.x ps good to be rid of google + 😊
{Calligraphy Cards - Shaz in Oz}
{Wonderful Words Of Life - Shaz in Oz}
I've not seen this technique before and it creates lovely results. I'm sure I have some tissue paper squares somewhere...!
LOVE your entry for the TIMI challenge but unfortunately you have more than 2 projects in one post, so I cannot vote on it.. better next time!
Sorry Angela, I was sure I saw two different cards... will do better next time :)
Post a Comment